
WADesk Admin Getting Started Guide — Team Initialization, Org Structure & Member Management
Getting Started for Admins
Navigation Path: Home → Team Manage → Team Members / Organization
Invite members, set up your organization, allocate port slots, and configure permissions — follow these steps to complete team initialization and help your team get started with WADesk quickly.
📹 Video Tutorial (approx. 5 min) Follow along with the video, or read the illustrated steps below directly.
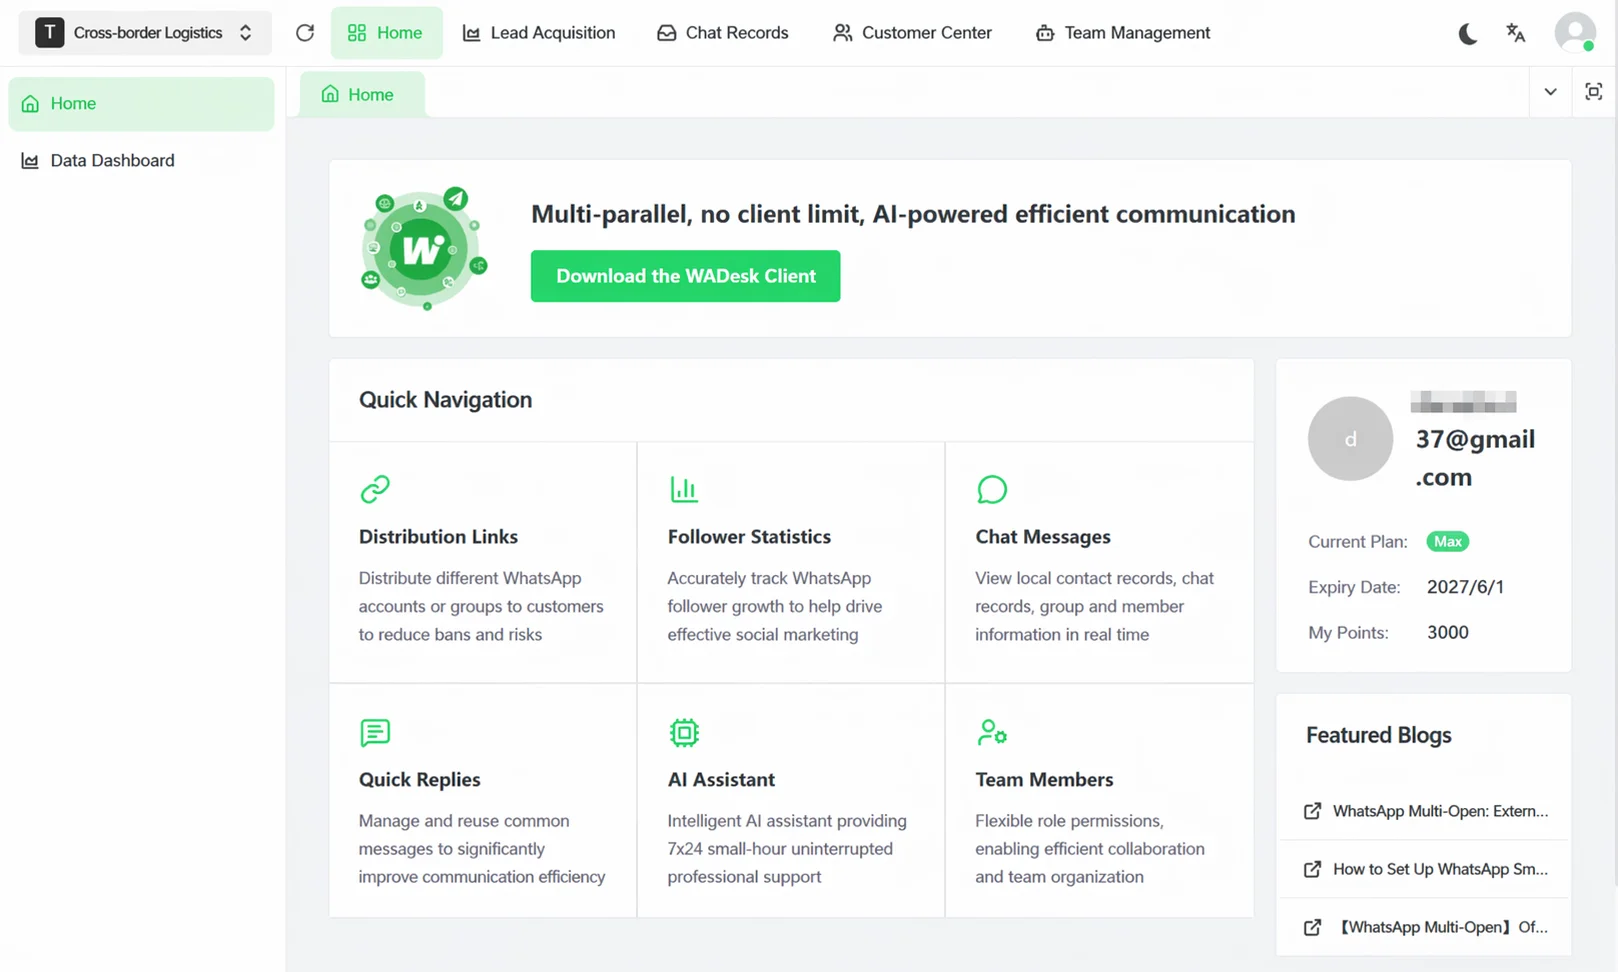
Log into Home
Open a browser, go to wadesk.io, click Workbench in the top right corner, and log in with your admin email and password.
After logging in, you'll see the Home home page.
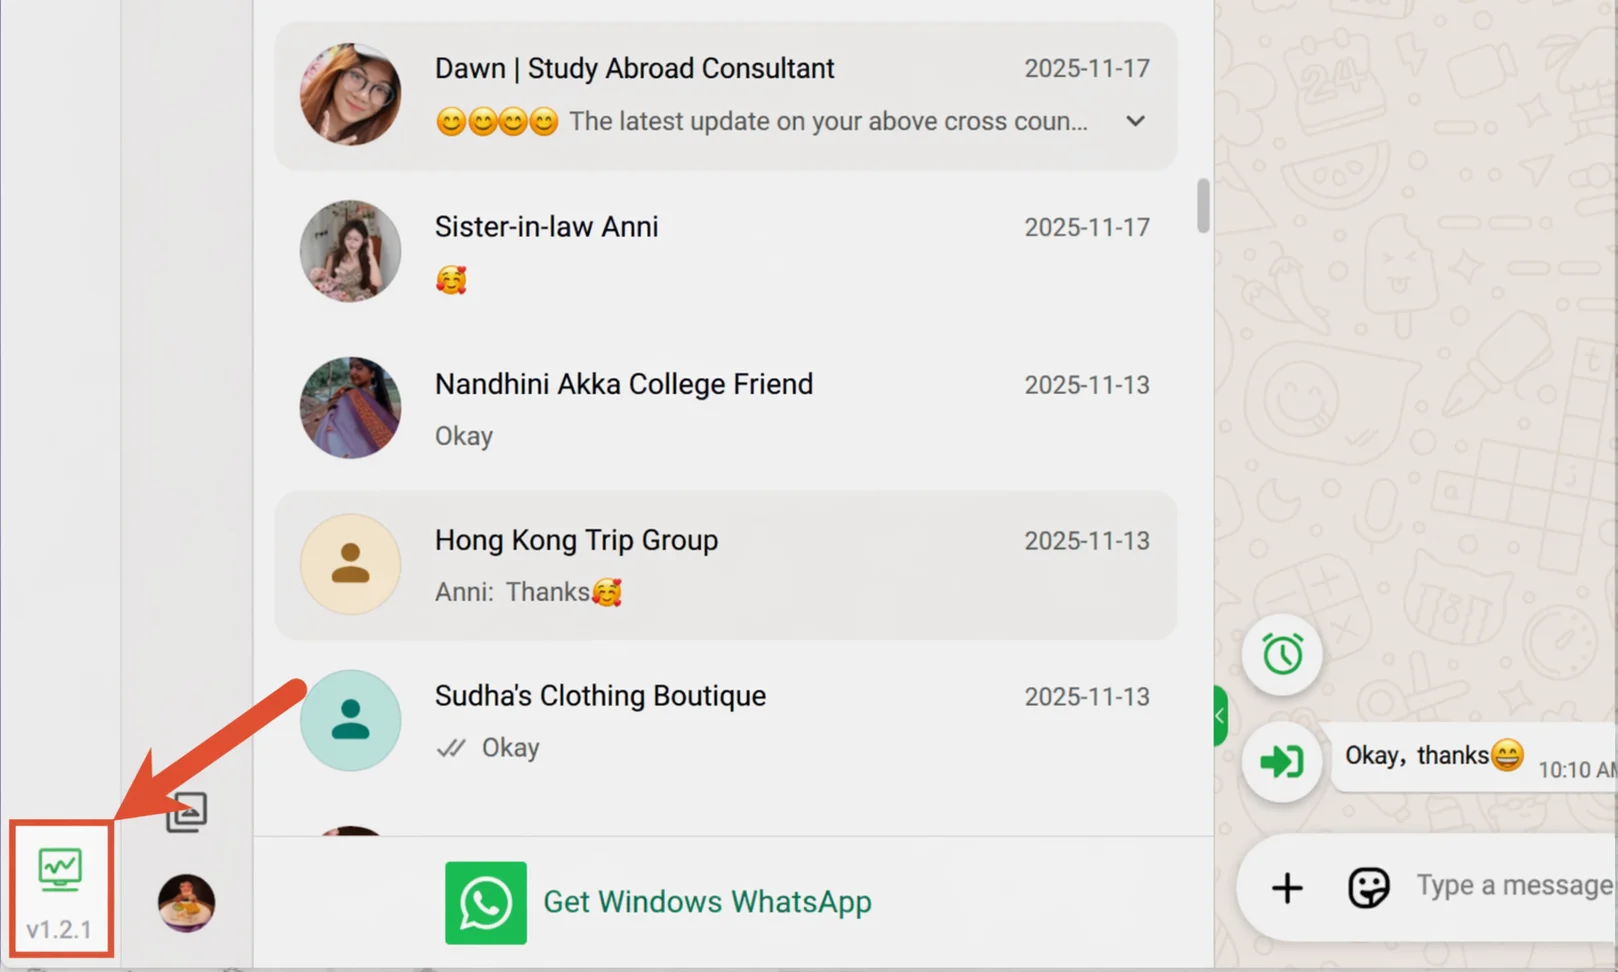
💡 You can also click the version number area in the bottom left of the WADesk Desktop Client to jump directly to Home.
Set Up Organization (Departments & Roles)
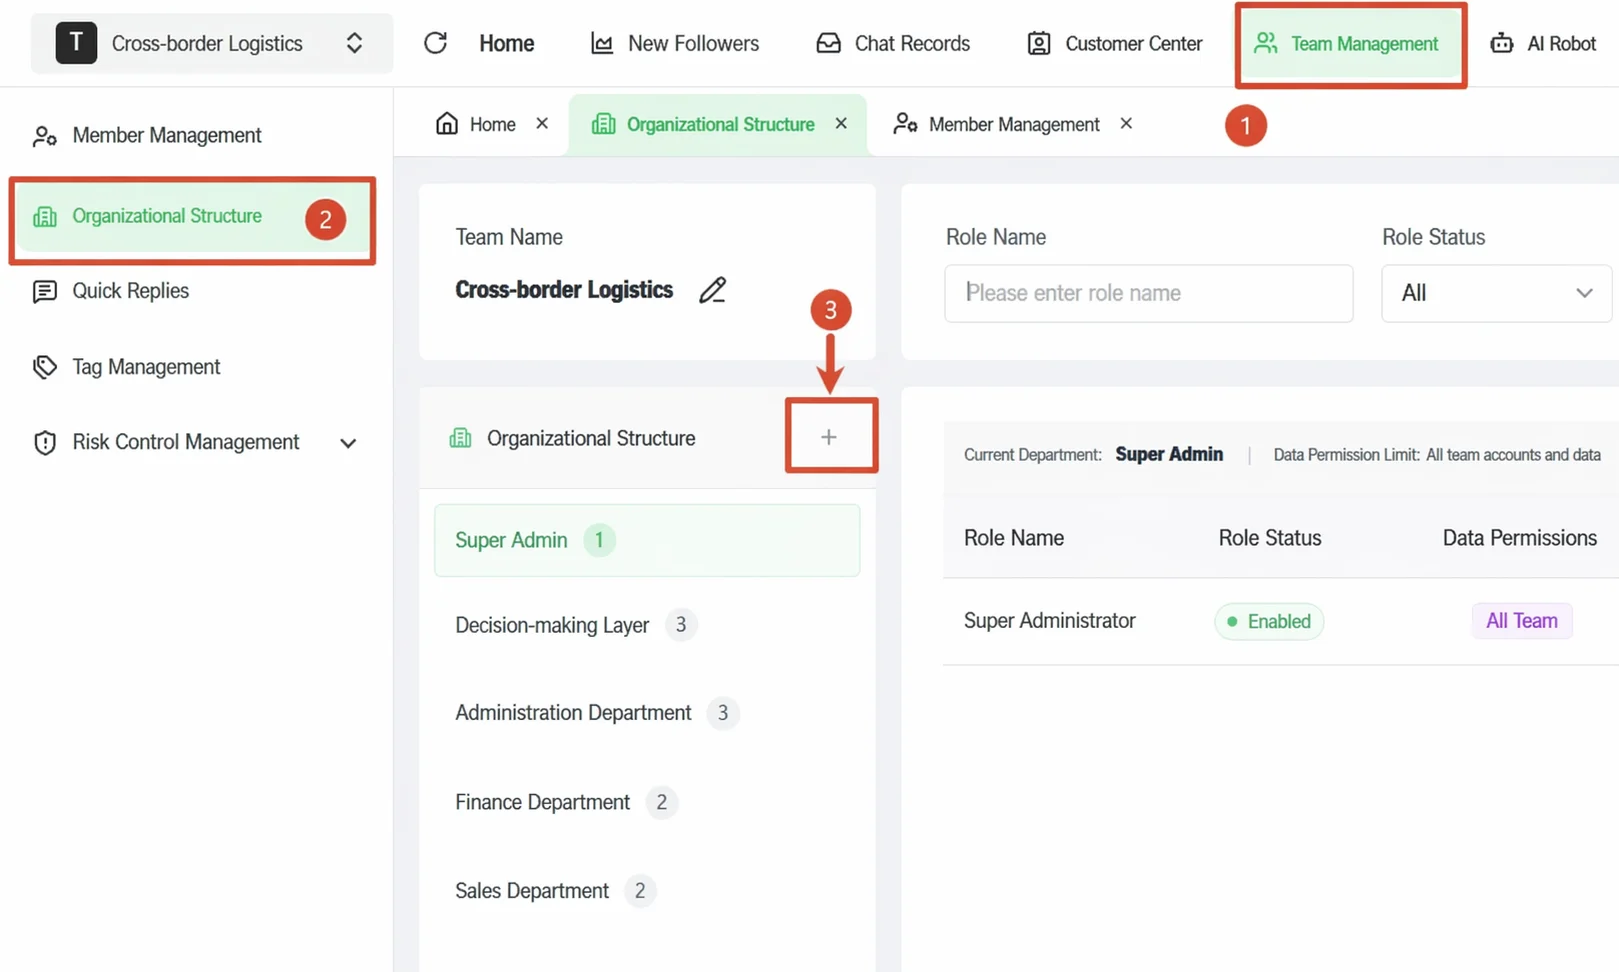
Navigation Path: Home → Organization
Before inviting members, we recommend setting up your organization first so you can assign roles and permissions directly when inviting.
Create a Department
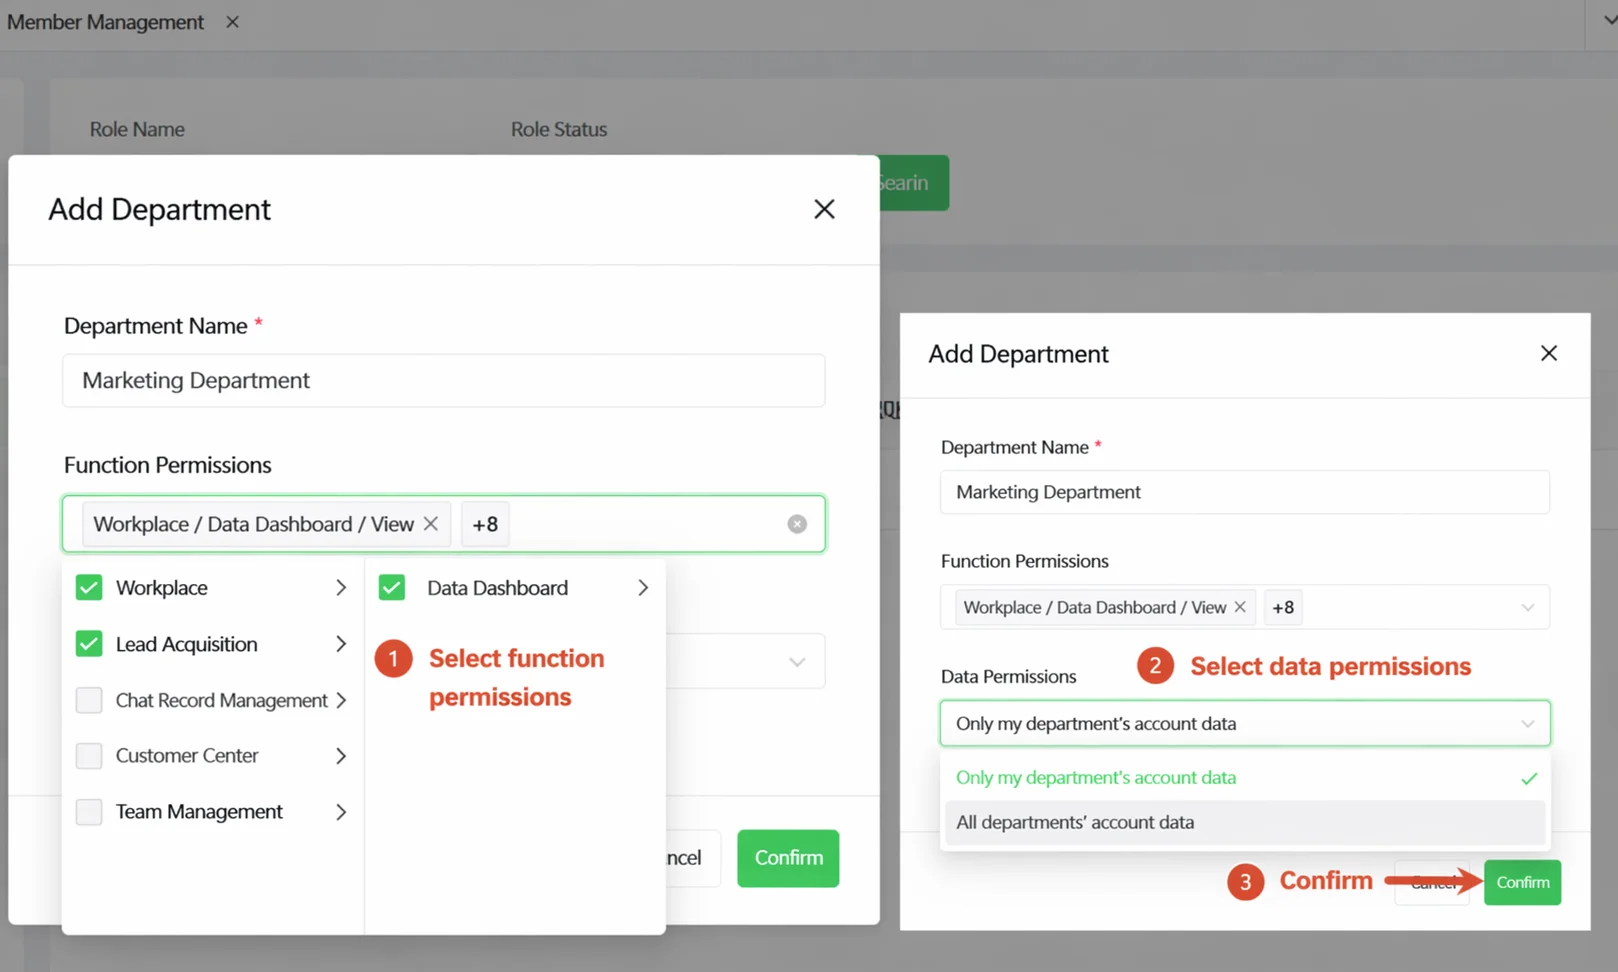
On the Organization page, the left side shows the department tree. Click the + button next to Organization and fill in the popup:
- Department Name: e.g. "Sales Team 1", "Customer Service Team"
- Feature Permissions: select which feature modules this department's members can use
- Data Permissions: select which accounts' data this department's members can see (All Team / Department Only / Own Only)
Click Confirm to create the department.
Create a Role
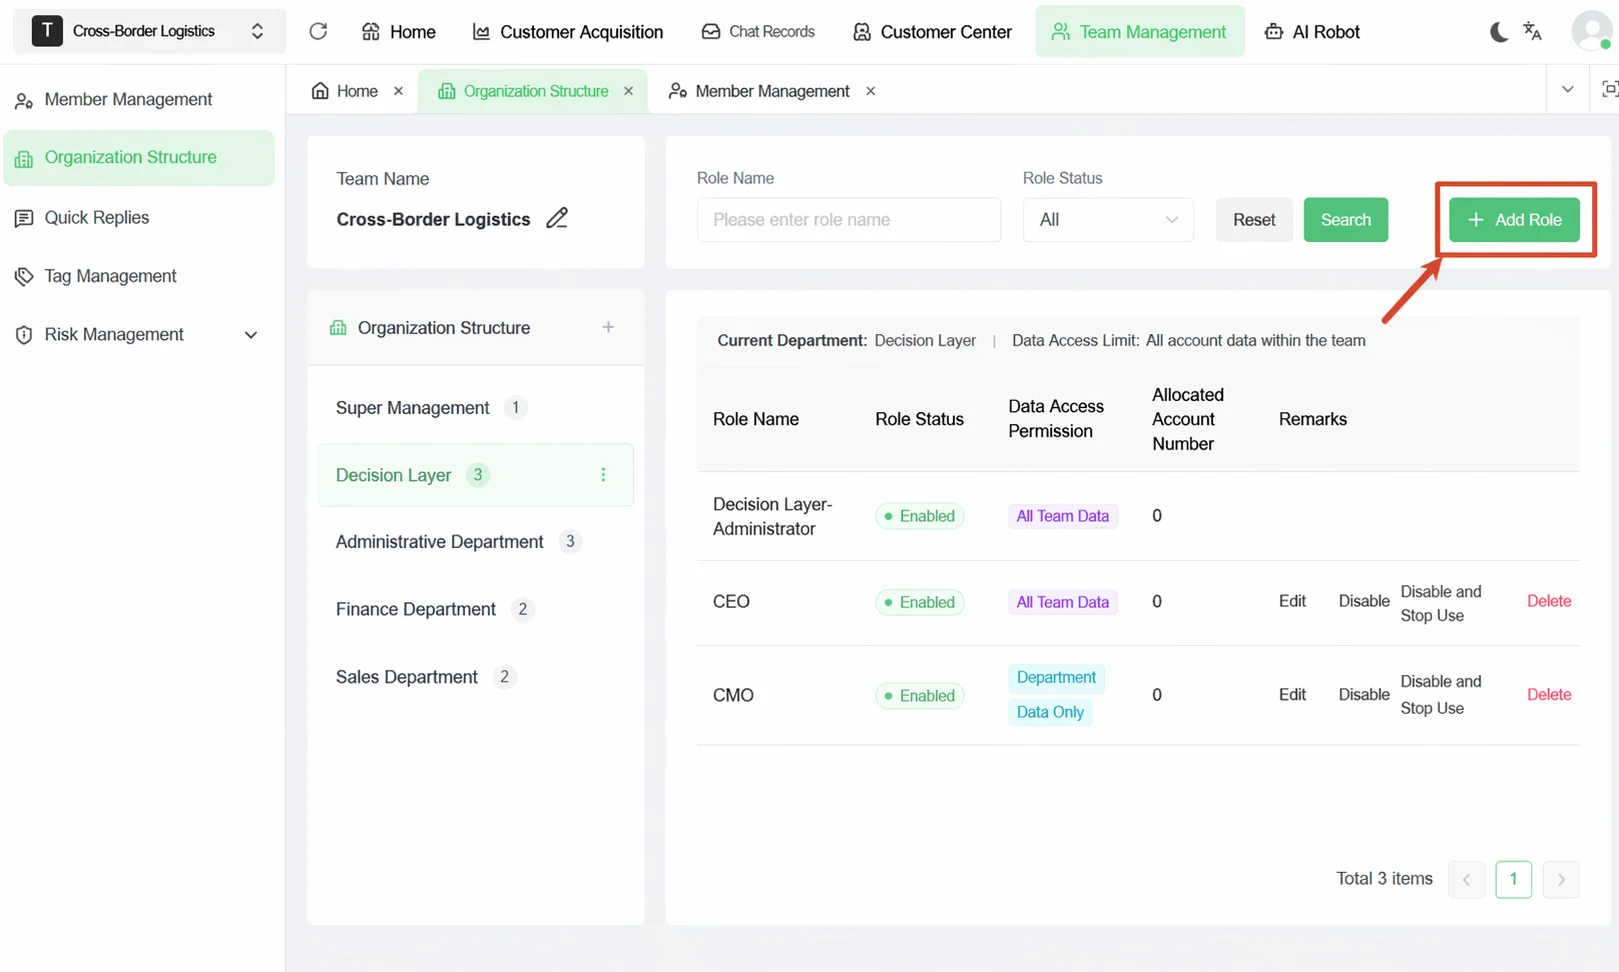
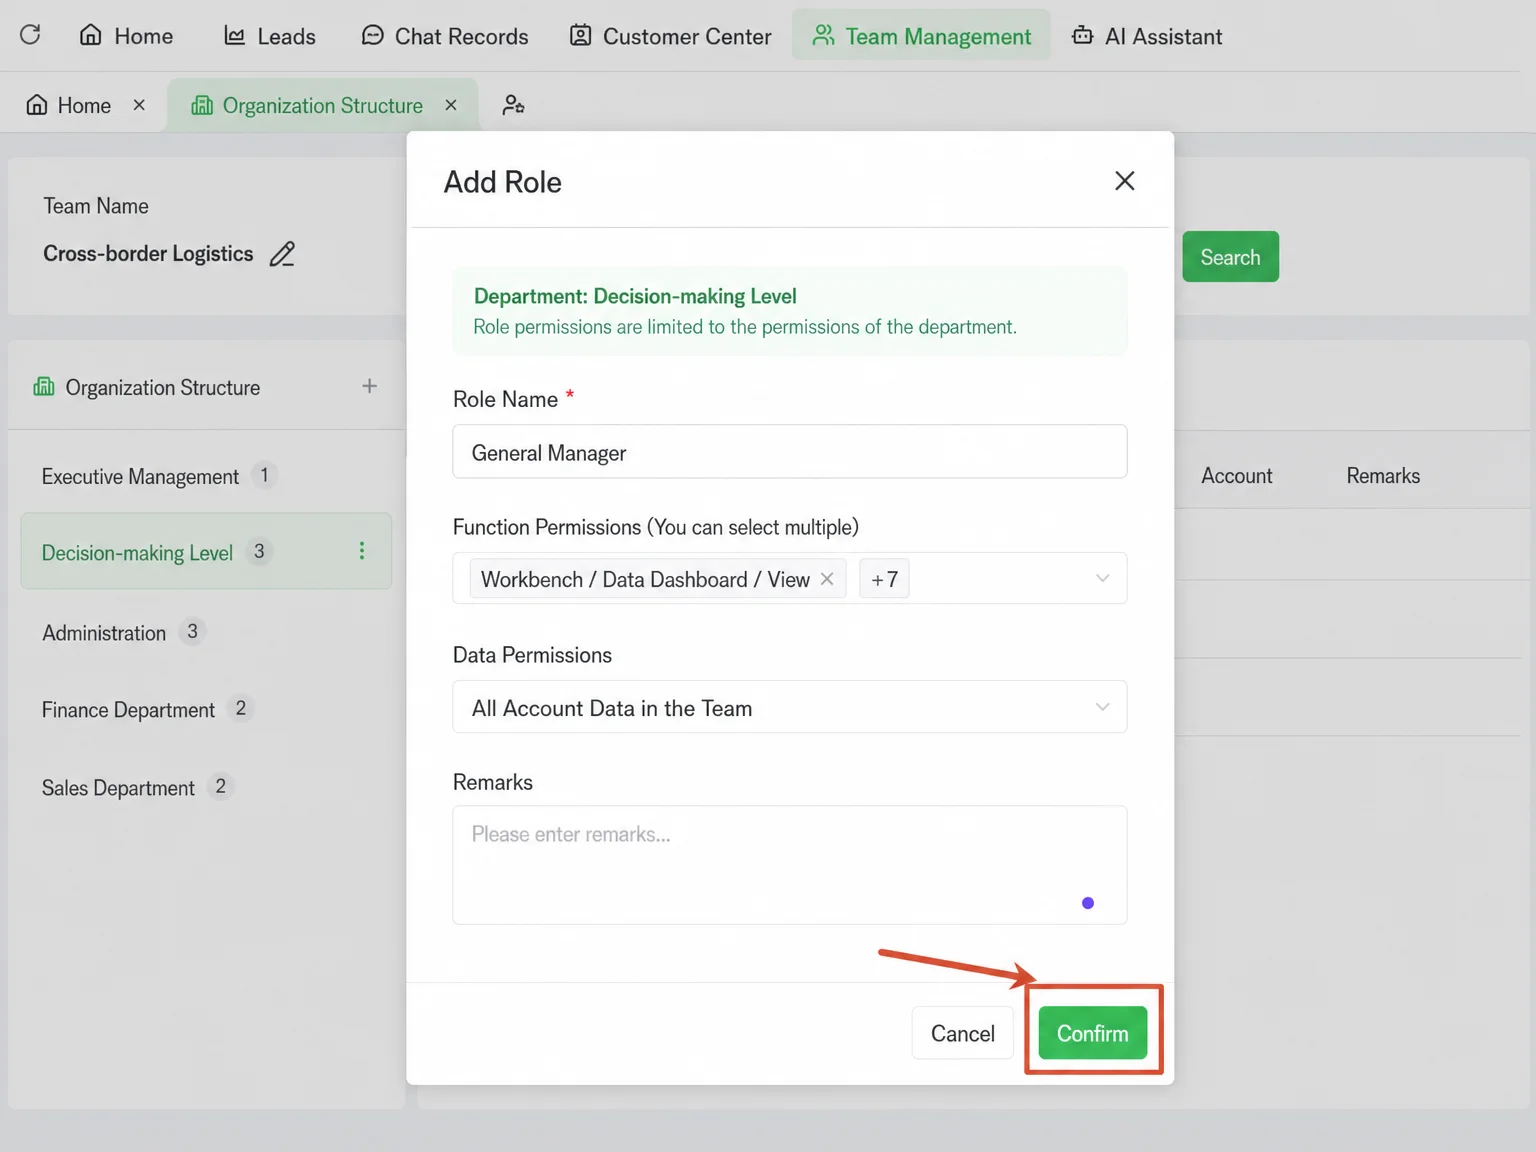
Select the department you just created, click + Add Role on the right, and configure in the popup:
- Role Name: e.g. "Sales Rep", "Team Lead"
- Feature Permissions: check the specific features this role can use
- Data Permissions: select the data scope this role can see
💡 Permission Configuration Principle: A role's permissions cannot exceed the upper limit of its parent department. We recommend configuring by the "principle of least privilege" — only grant the permissions an employee needs to do their job.
Invite Team Members
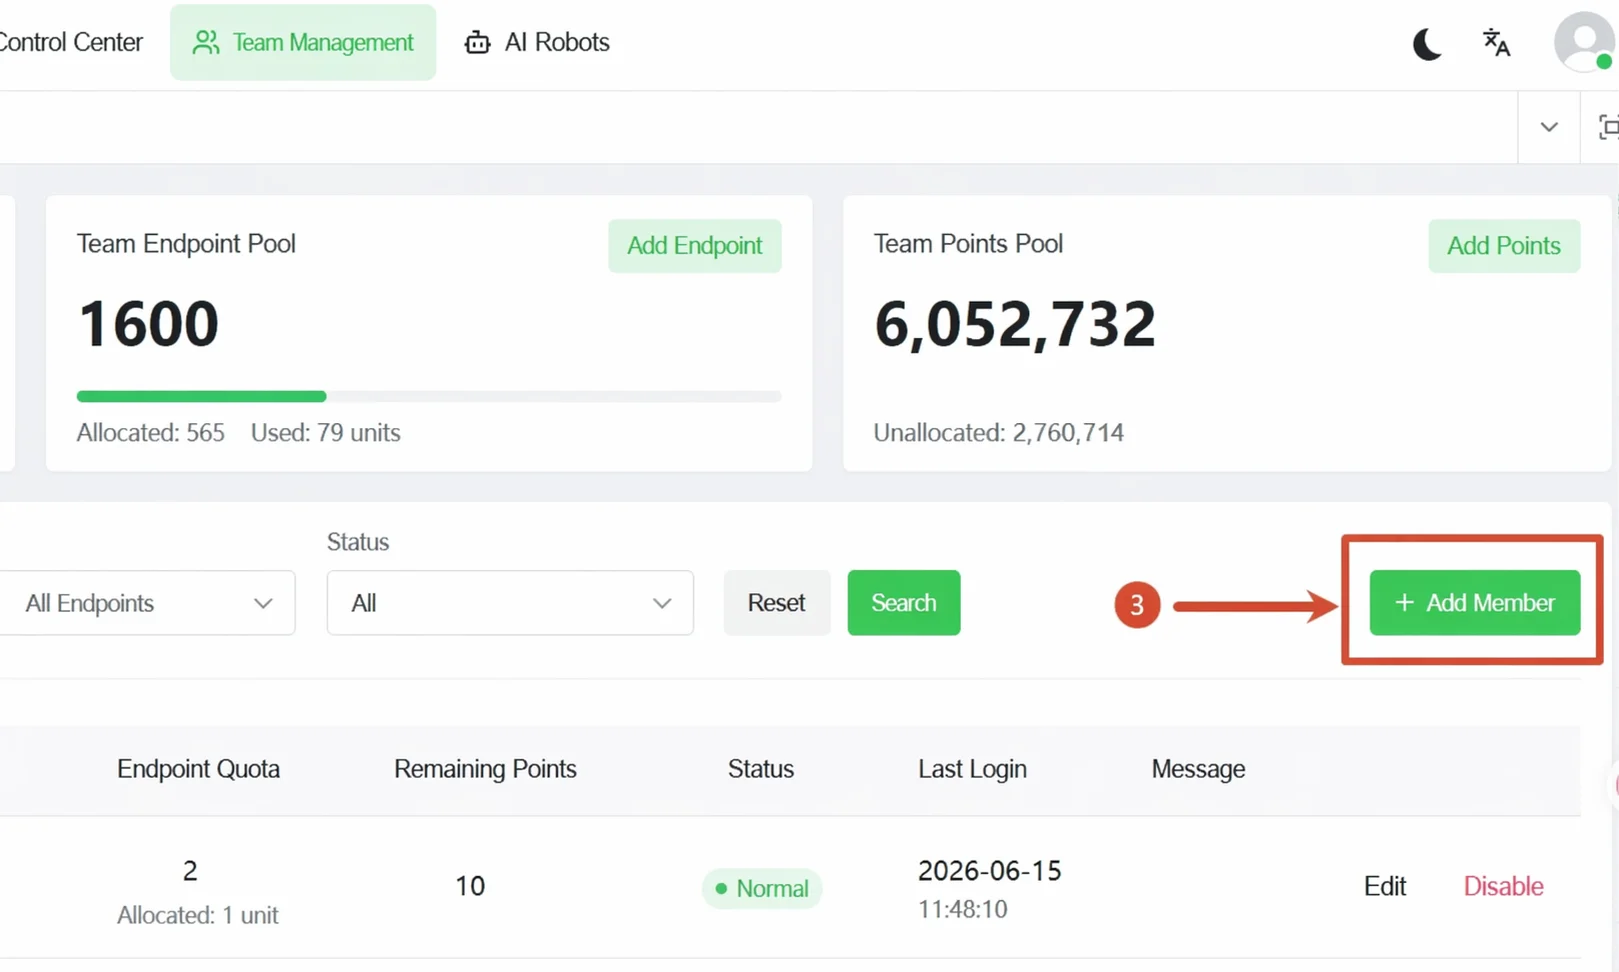
Navigation Path: Team Manage → Team Members → + Add Member
On the Team Members page, click the + Add Member button in the top right to open the invite popup.
In the popup:
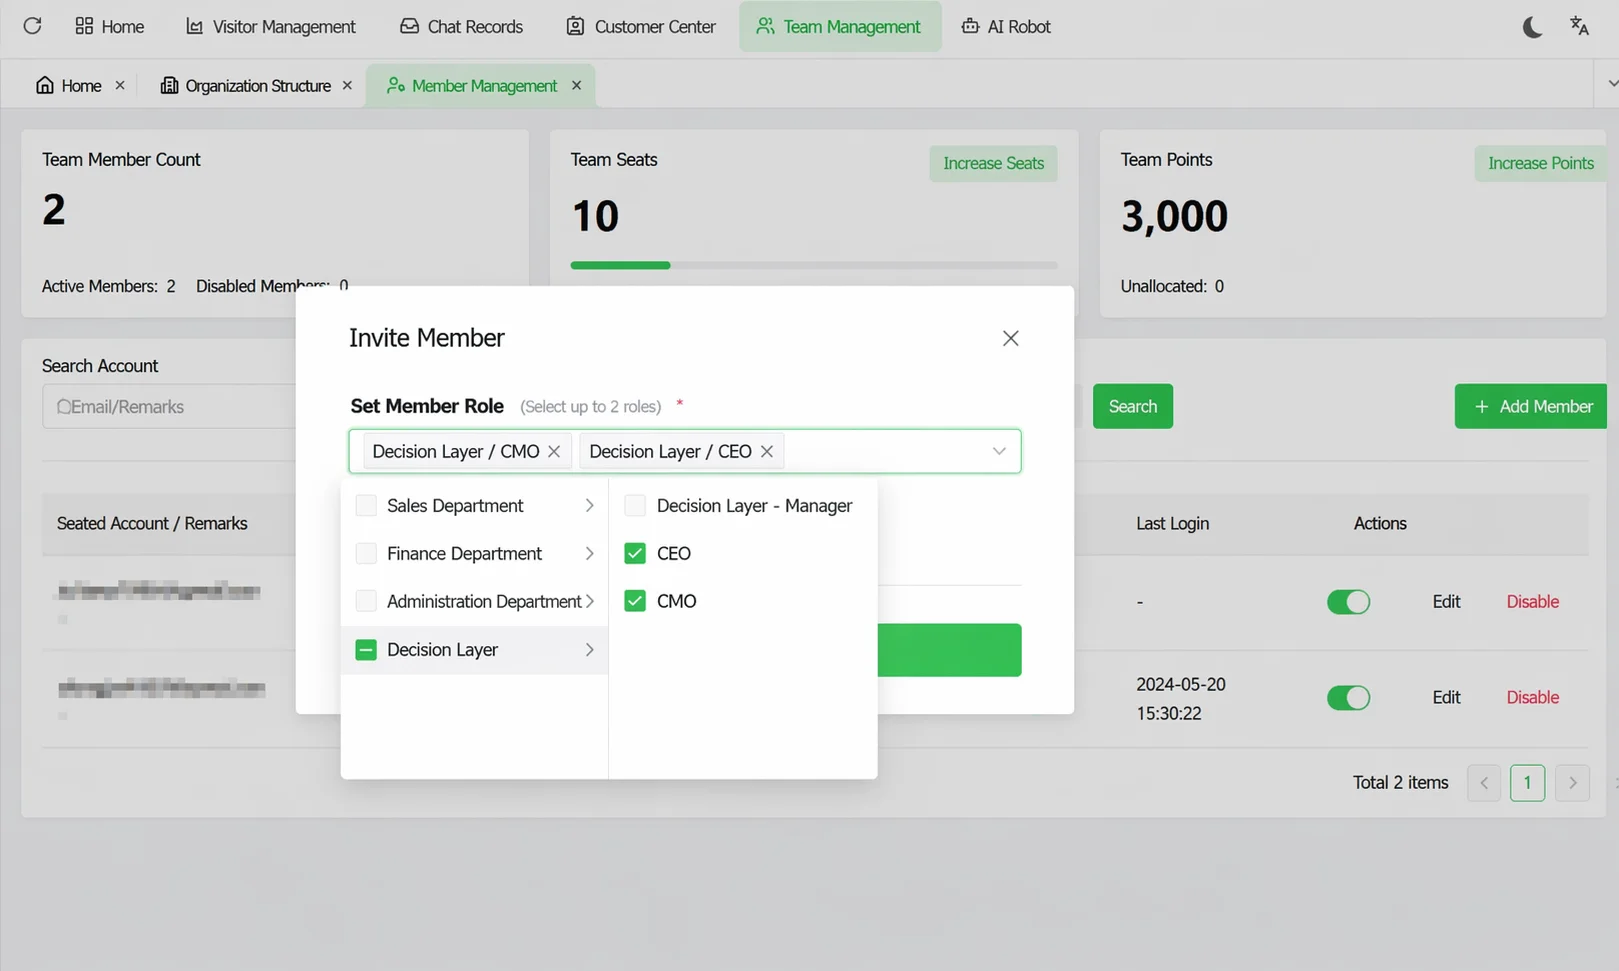
- In the Set Member Role dropdown, select the role you created (up to 2 roles).
- Click Generate Invite Link (valid for 3 days).
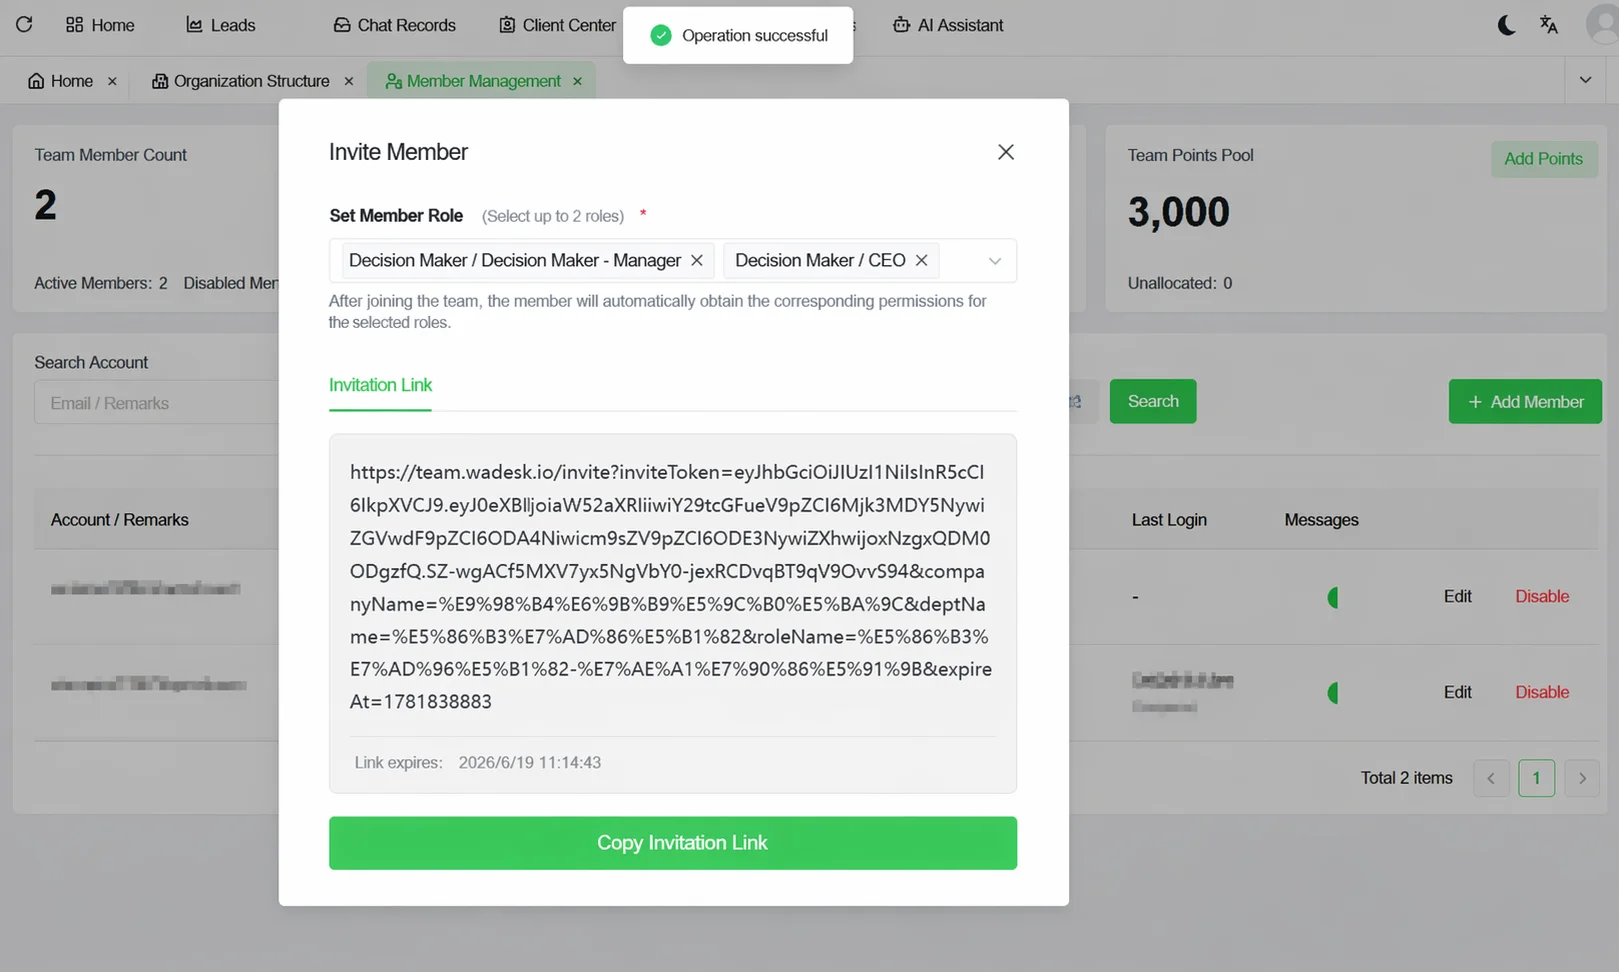
- Click Copy Invite Link and send the link to the team member.
The member clicks the link, joins your team, and receives the permissions of the assigned role(s).
Allocate Port Slots
Navigation Path: Team Manage → Team Members → Edit Member
After joining, members have no port slots by default and cannot add WhatsApp accounts in the Desktop Client. You need to allocate port slots for each member.
Find the member and allocate ports and credits in the port slot and remaining credits section:
- Port Count: determines how many WhatsApp accounts the member can run simultaneously; adjust with the + / - buttons.
- Remaining Credits: determines the member's available AI feature quota; adjust with the + / - buttons.
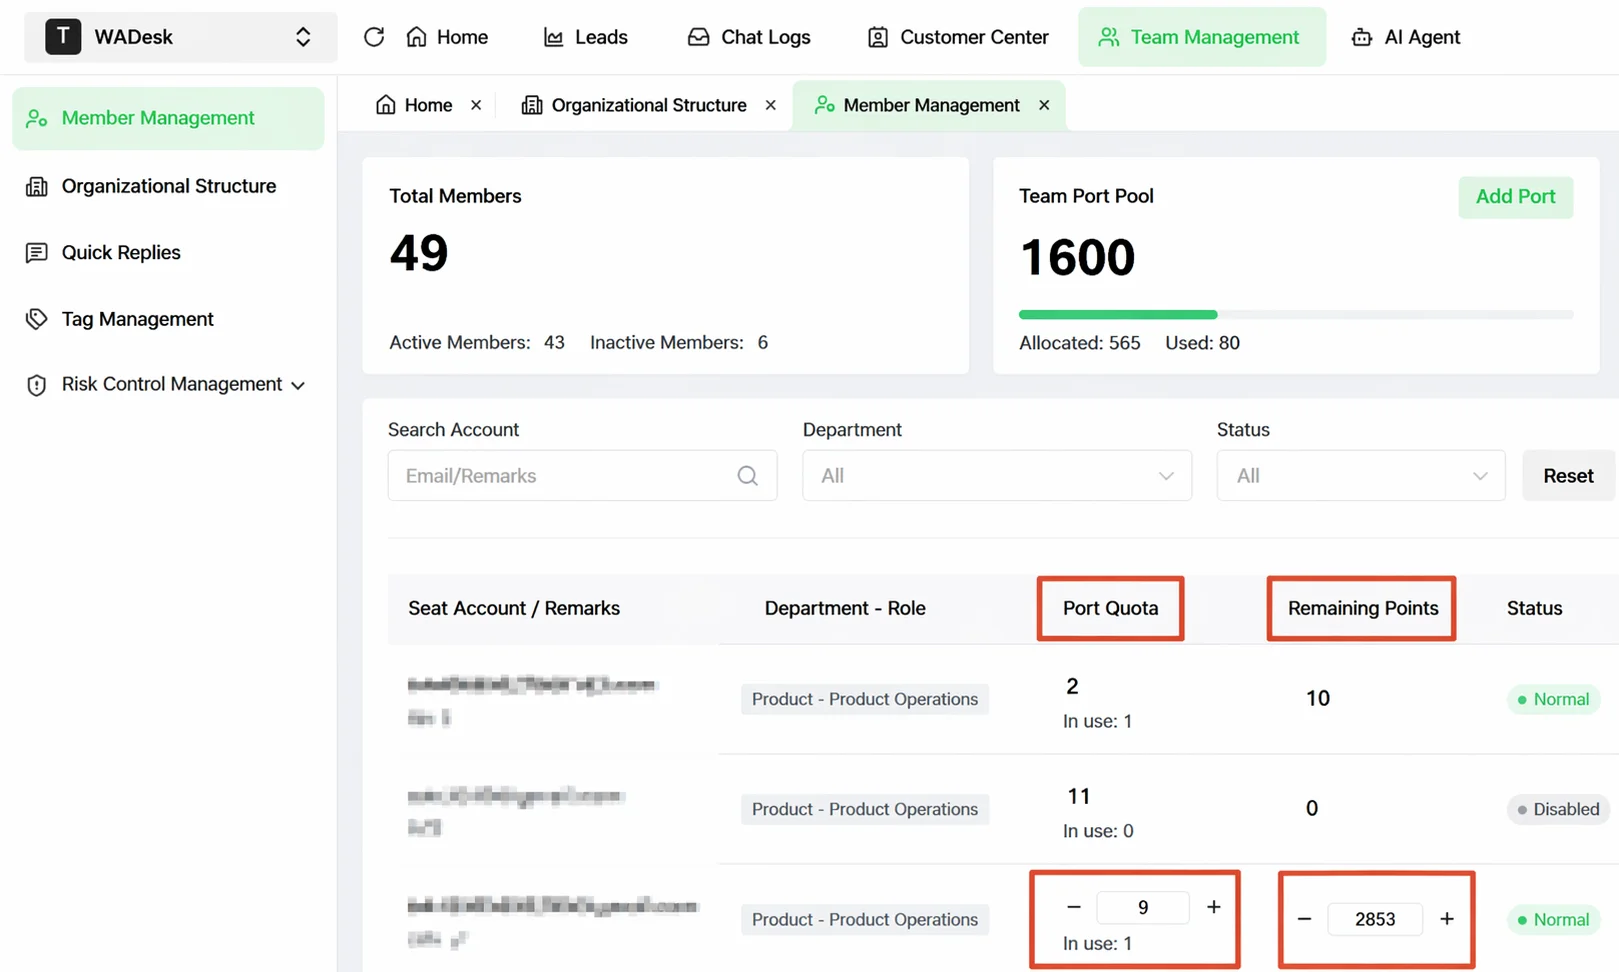
💡 About Port Slots:
- The team's total port count is determined by the Plan and can be viewed in the Team Port Pool card at the top of the Team Members page.
- Allocated = total ports already distributed to members; Occupied = the number of WhatsApp accounts members are actually logged into.
- To purchase more ports, click the Purchase Ports button at the top.
View the Team Data Dashboard
Navigation Path: Home home page → Data Dashboard on the left
After completing team initialization, you can use the Data Dashboard to monitor team operations in real time.
The dashboard provides the following core metrics:
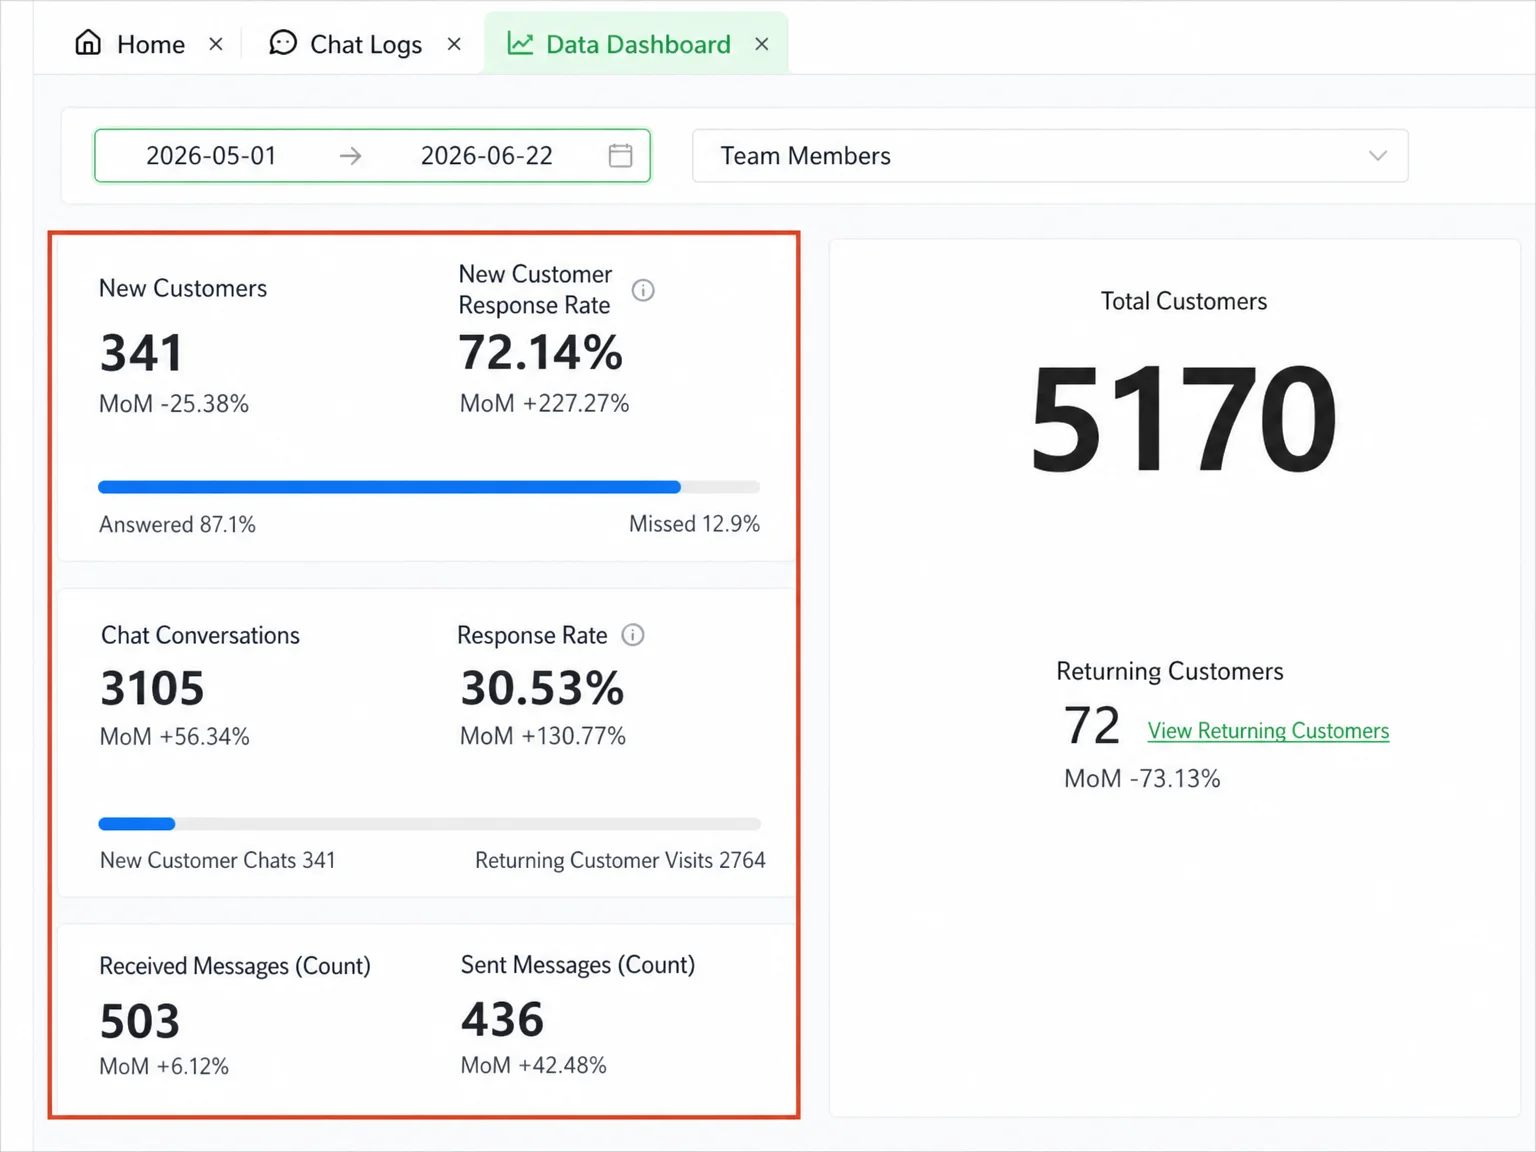
| Metric | Description |
|---|---|
| Total Customers | Total contacts across all team accounts |
| New Customers | Number of new contacts in the selected period |
| Chat Sessions | Total number of sessions with communication |
| Messages Sent/Received | Team message volume statistics |
| New Customers Top 5 | Ranking of the 5 best-performing members |
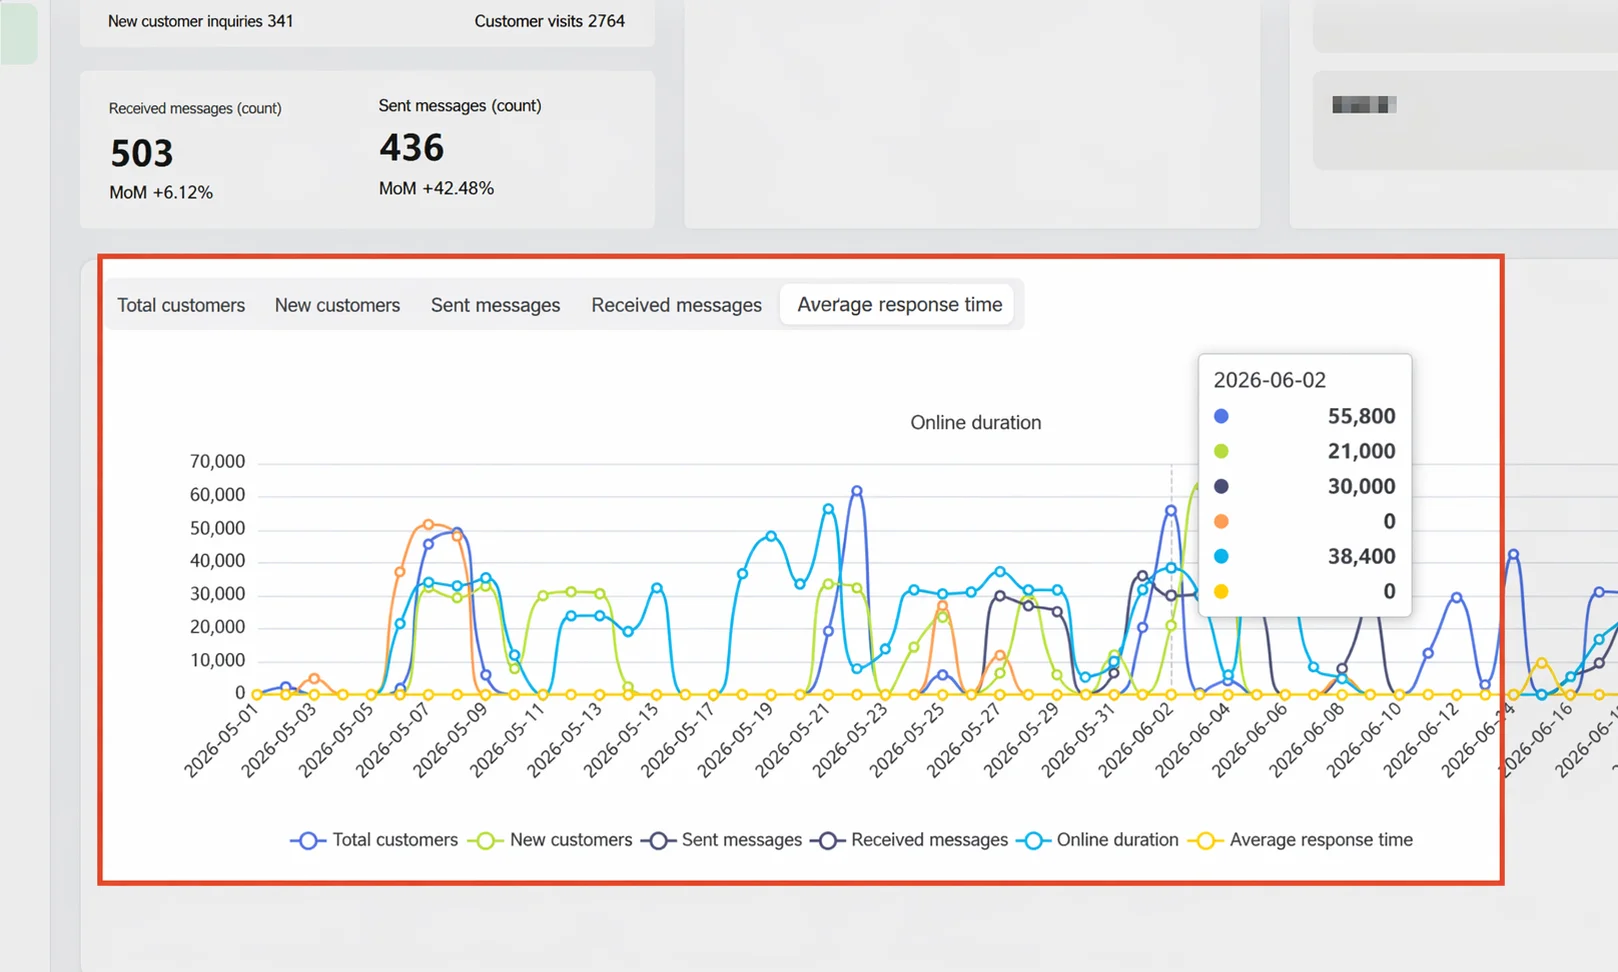
You can filter data by time range and team member, view trend line charts for each member, or export the data to Excel.
Important Notes
⚠ Configure data permissions carefully: Setting data permissions to "All Team" means the role can see all employees' customer data. Configure based on actual management needs.
FAQ
Q: The team port pool quota is running low — how do I purchase more? A: In the Team Port Pool card at the top of the Team Members page, click the Purchase Ports button to jump to the plan purchase page and complete the purchase.
Q: How do I view an employee's chat history with a customer? A: Click Chat Records in the top navigation bar, select the employee's account on the left, select the contact in the center, and the full chat history displays on the right.
Q: Can a member be assigned multiple roles? A: Yes. Each member can be assigned up to 2 roles, and the system takes the union of the two roles' permissions.