
How to Manage Organization Structure and Role Permissions in WADesk
Managing Organization and Role Permissions
Navigation Path: Home → Team Manage → Organization
The Organization feature is used to create departments and configure role permissions for granular team access control. Through a well-designed structure, you can control which data each member can see and which functions they can operate.
📹 Video Tutorial. Follow along with the video, or read the illustrated steps below directly.
Steps
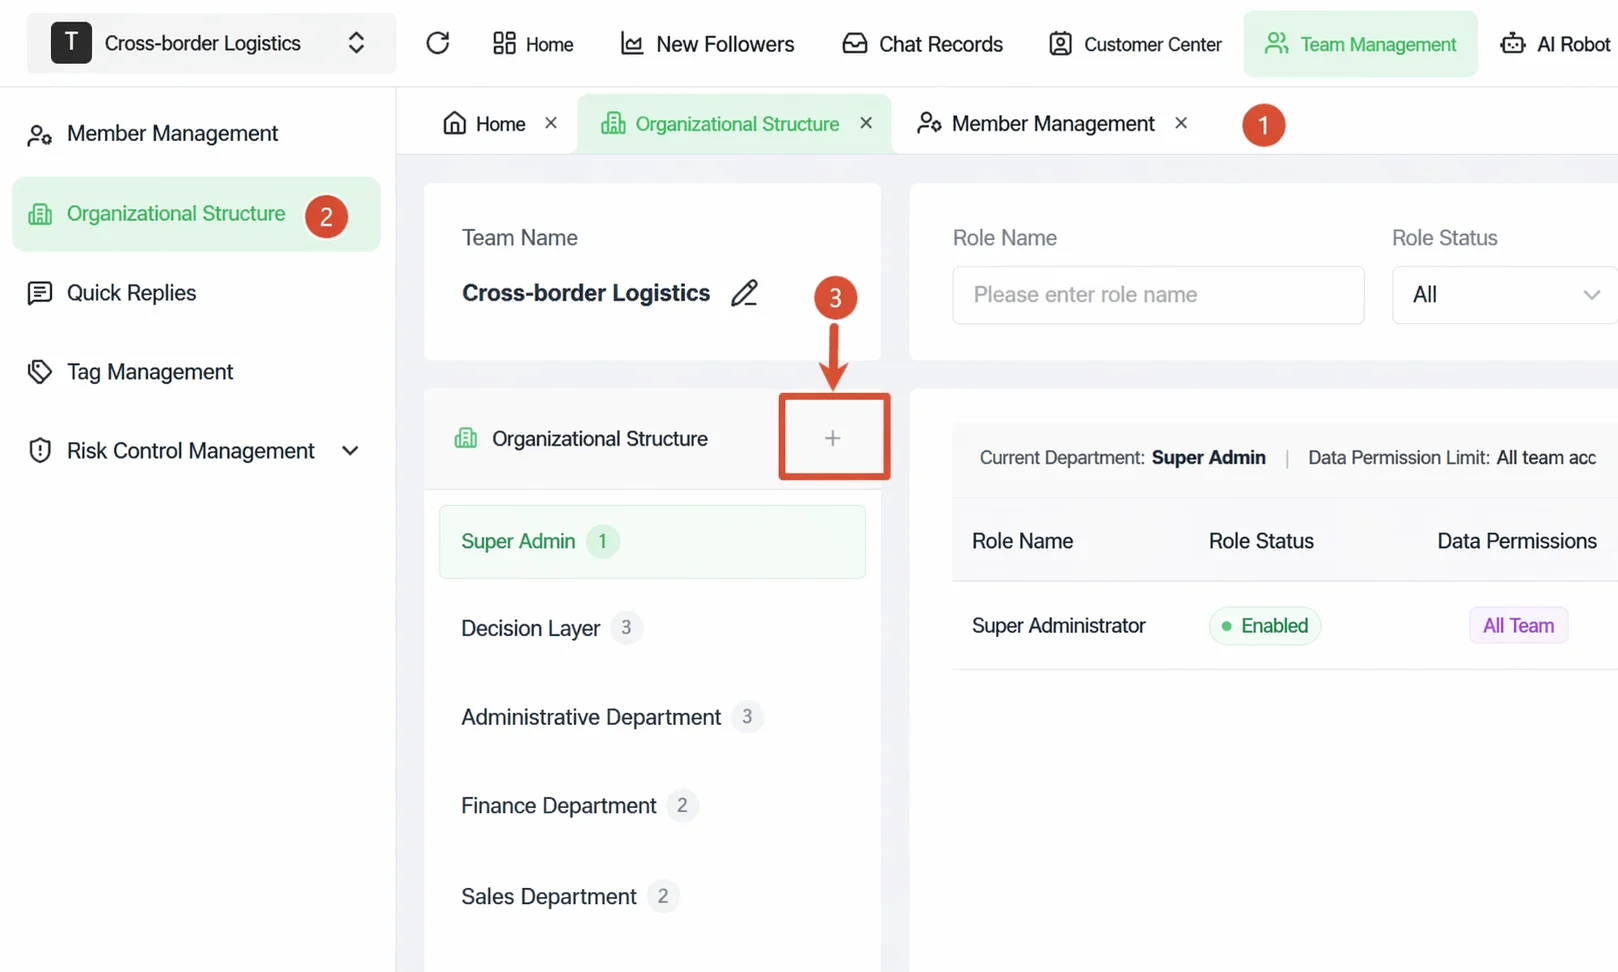
Step 1: Enter the Organization Page
In the top navigation bar of Home, click Team Manage and select Organization. The left side shows the department directory; the right side shows the role management area for the currently selected department.
Step 2: Create a Department
In the left department directory, click the + button next to Organization to bring up the Add Department dialog.
Fill in the following information:
- Department Name: Enter a department name, such as "Sales Team 1" or "Customer Support".
- Function Permissions: Select the functional modules this department can use (department permissions are the ceiling for all role permissions within the department).
- Data Permissions: Select the maximum data scope for the department, determining which account data department members can see at most (options: "All Team Account Data", "All Department Account Data", or "Own Account Data Only").
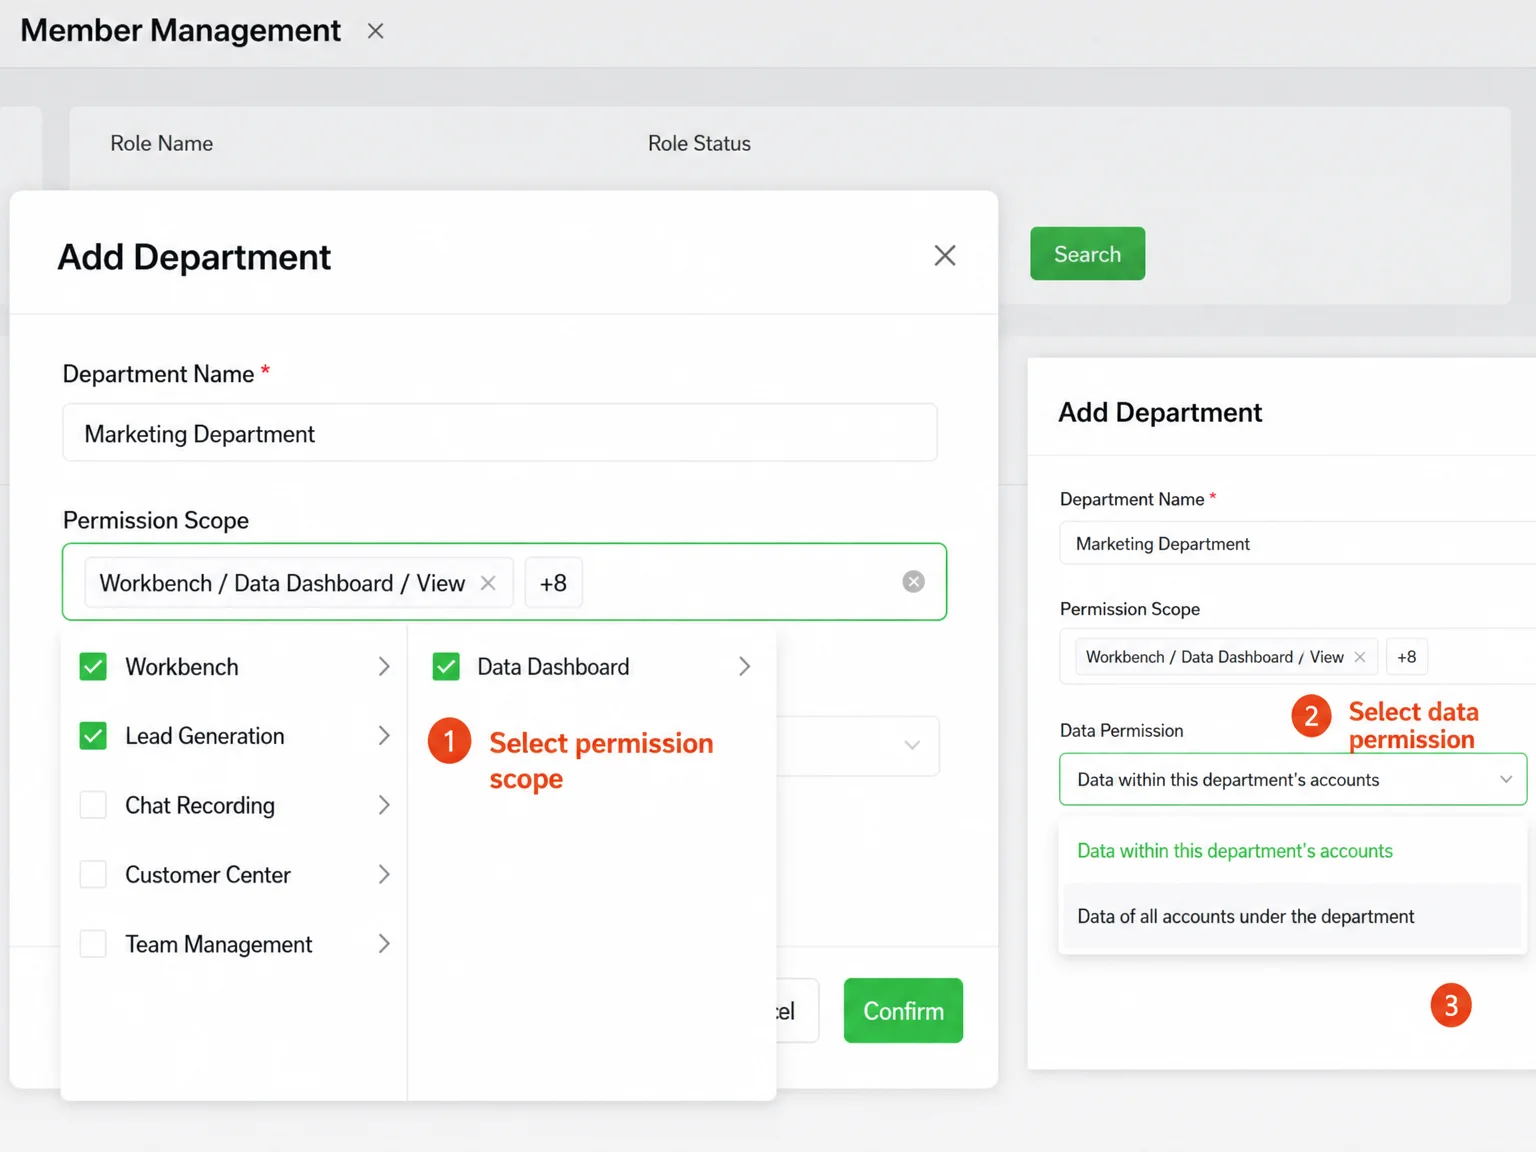
Click Confirm to save.
Important: Department permissions are the ceiling for all role permissions within that department.
Step 3: Add a Role Under the Department
In the left department directory, click to select the target department; the right side shows the role list for that department. Click + Add Role in the upper-right corner to open the role configuration form.
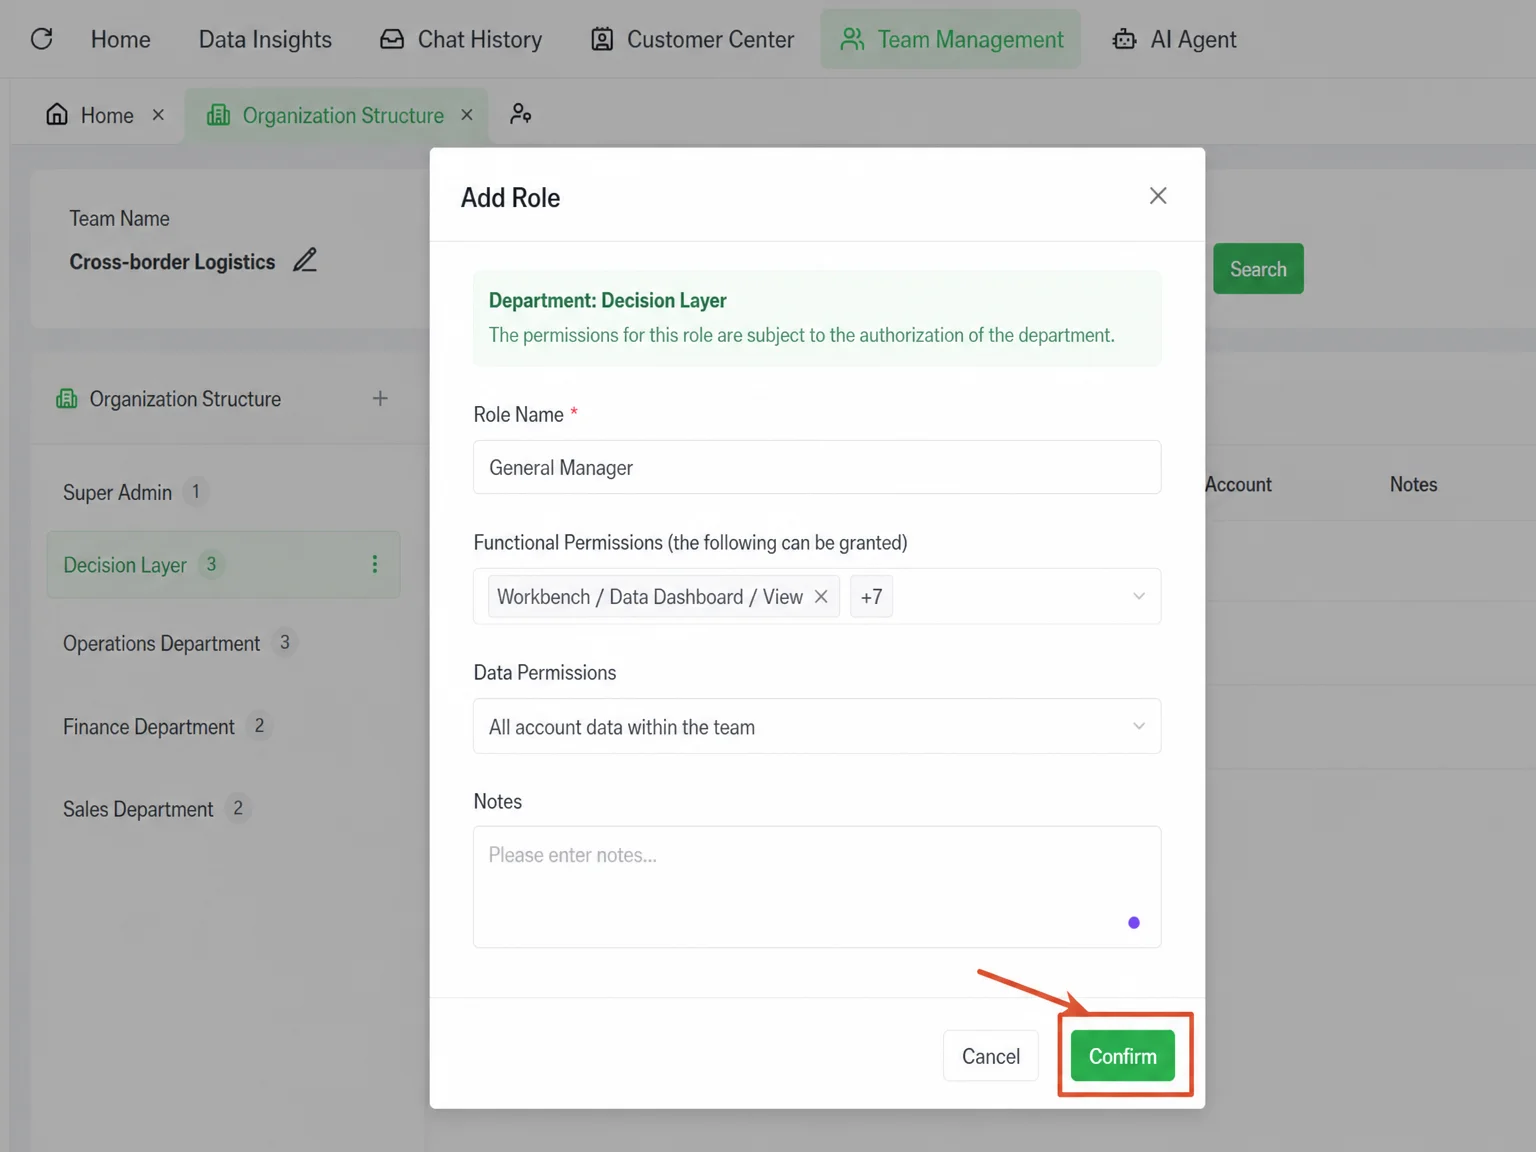
Fill in the following information:
- Role Name: Enter a custom role name, such as "Sales Rep", "Manager", or "Support".
- Function Permissions: Check the specific functions this role can use from the dropdown (can only be selected within the department's already-granted permissions).
- Data Permissions: Select the data scope this role can see.
Click Confirm to save.
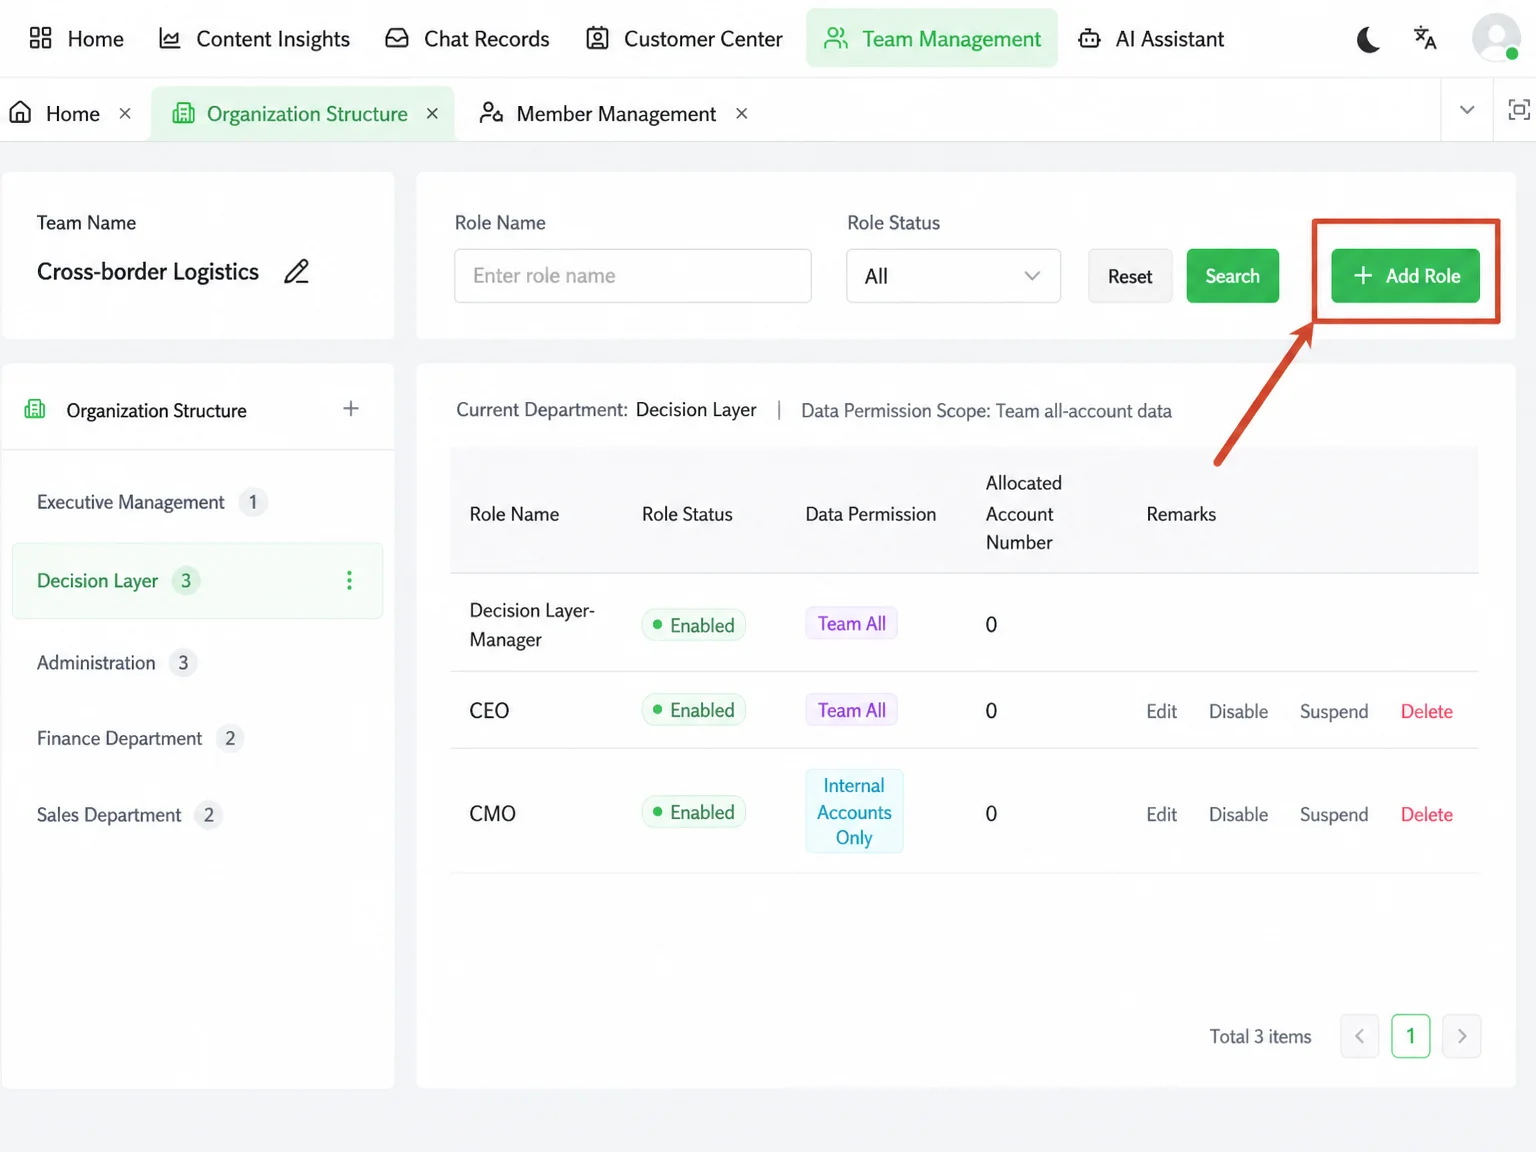
Step 4: Assign Members to Roles
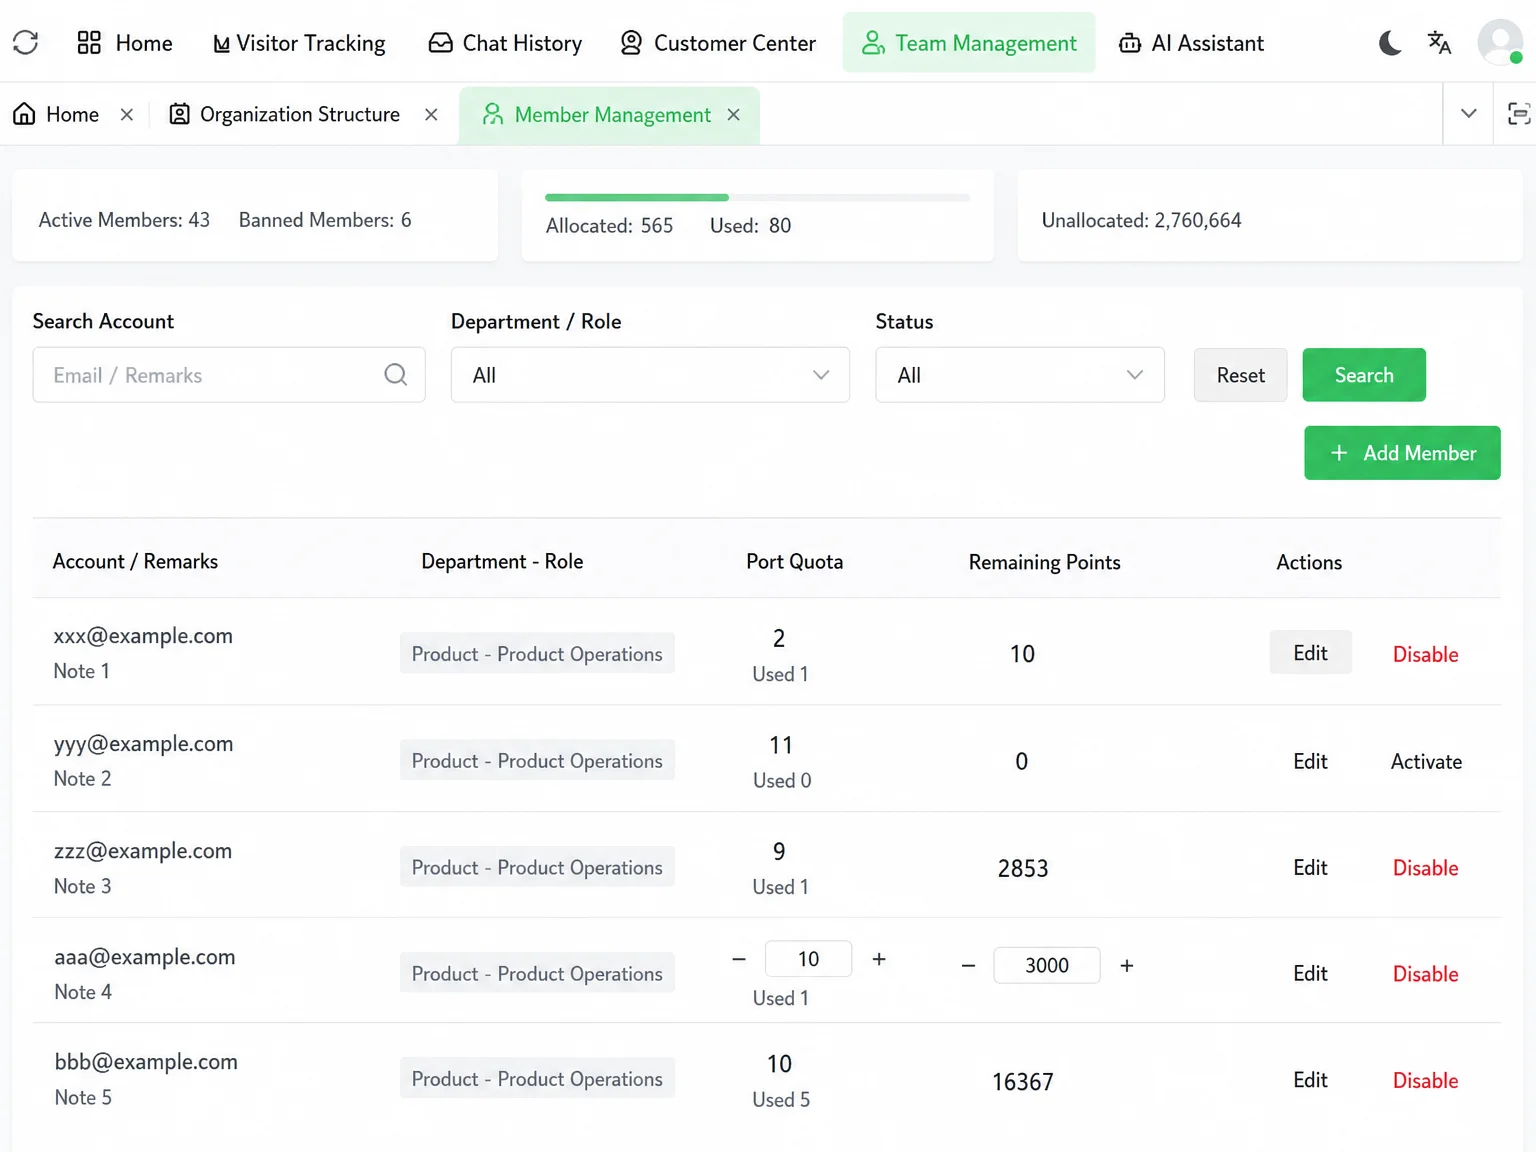
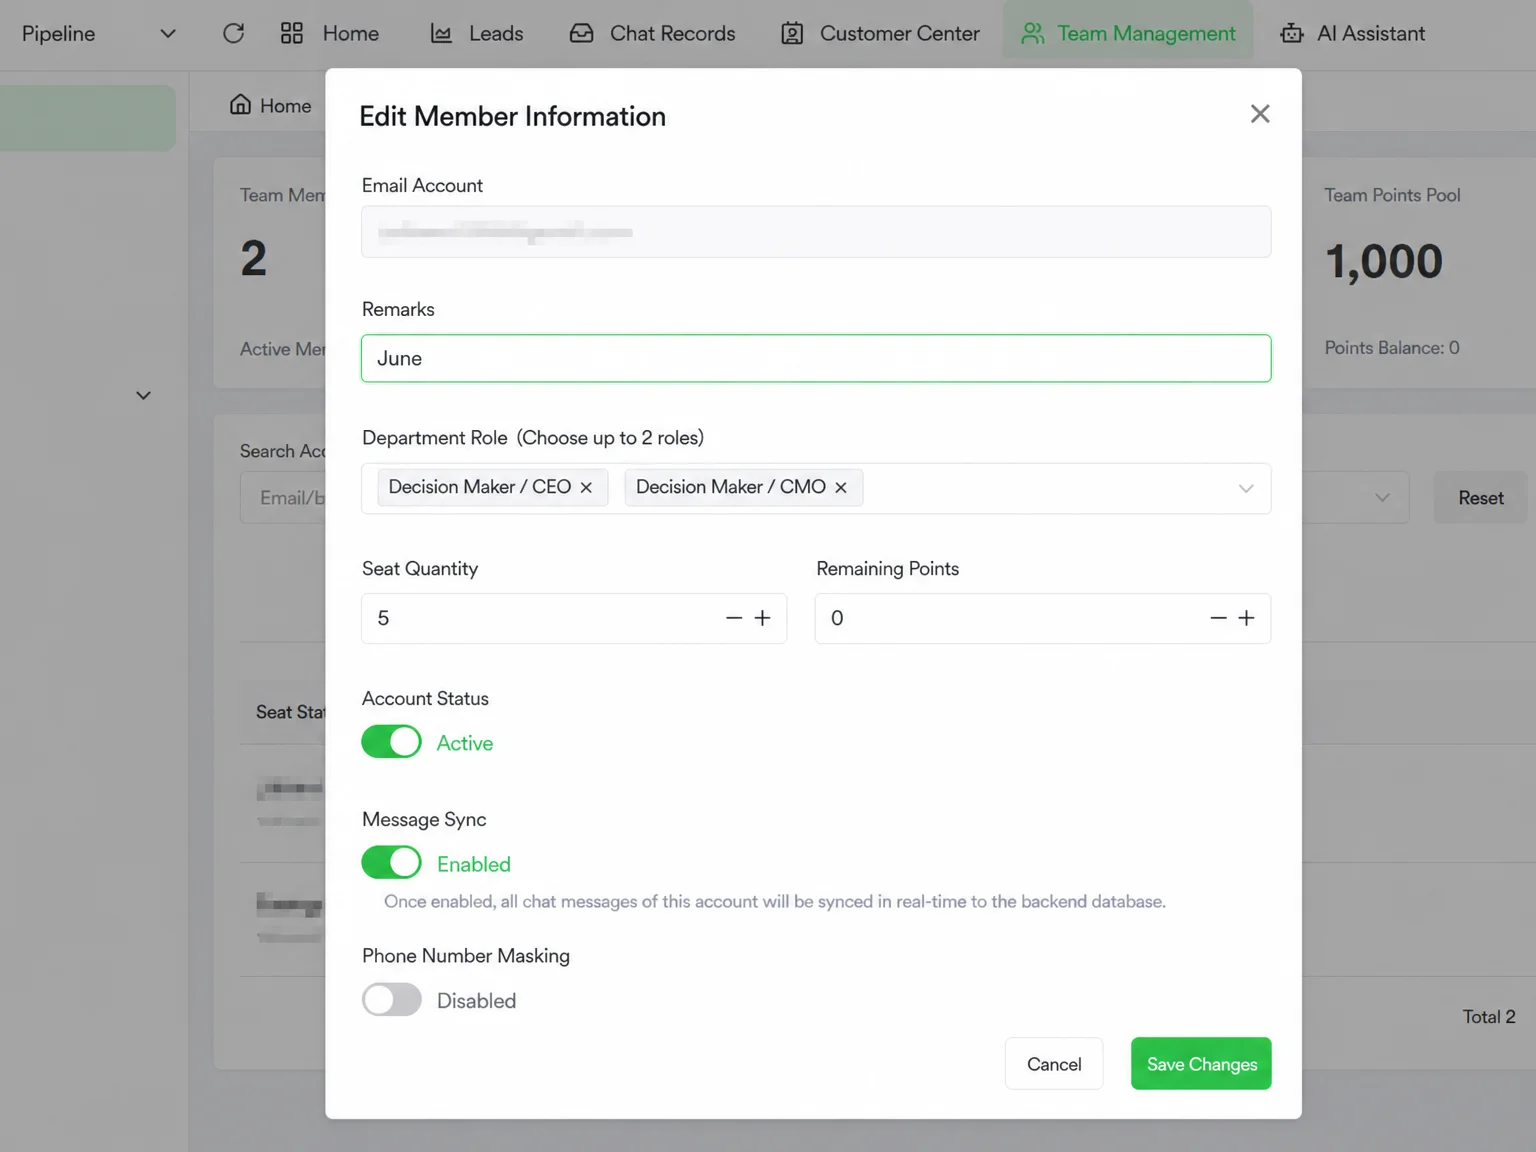
After the role is created, go to the Team Members page, find the member to assign a role to, click Edit, and select the corresponding role from the Department Role dropdown (up to 2 roles can be assigned simultaneously). Changes take effect immediately upon saving.
Important Notes
⚠ Permission Ceiling Rule: Department permissions determine the ceiling for role permissions; role permissions determine the ceiling for member permissions. Cross-level authorization is not allowed. To grant a member higher permissions, you must first raise their department's permission configuration.
⚠ Before disabling a role, confirm that no active members are assigned to it. Otherwise, after disabling, those members' permissions will be revoked immediately, affecting normal use.
⚠ Data permissions directly affect the business data scope a member can see. "All Team Account Data" means the role can view all employees' customers and chat records—assign it cautiously to non-management roles.
⚠ After modifying a role, the new permissions take effect after the member refreshes the page—no re-login required.
FAQ
Q: How do the three permission tiers (Team / Department / Individual) actually work? A: The core logic is "a higher tier sets the ceiling for the tier below it." Cross-level authorization is not allowed.
Example: The company enables the "Chat Record Viewing" permission. Department A can choose whether to grant it to members. If Department A does not enable it, even the super admin cannot individually grant it to a specific Department A member—because the department permission is the ceiling for individual permissions.
Q: What is the difference between "Own Account Data Only" and "All Department Account Data"? A: "Own Account Data Only" means the member can only see customers and chat records under their own WhatsApp accounts, and cannot view colleagues' data—suitable for regular sales roles. "All Department Account Data" means the member can see all members' data in the same department—suitable for department managers or team leads. "All Team Account Data" provides visibility into the entire team's data—suitable for super admins.
Q: How do I adjust permissions for a single member without affecting others in the same role? A: WADesk's permission system is role-based—members in the same role share the same permissions. If you need to configure different permissions for someone individually, create a dedicated role for them, or assign a second role (each member can hold up to 2 roles, and permissions are the union of both roles).
Q: What happens to members assigned to a role after the role is disabled? A: After the role is disabled, assigned members immediately lose the function and data permissions of that role, and will see an "insufficient permission" prompt on their next operation. We recommend migrating related members to another role before disabling the role.