
Complete Guide to Managing Leads and Public Lead Pool in WADesk
Managing Leads
Navigation Path (Admin): Home → Customer Center → Public Lead Pool
Navigation Path (Sales): Desktop Client → right sidebar → Leads
The Leads module manages potential customer lists. Admins bulk import and assign leads from Home; sales reps receive and follow up on them in the Desktop Client.
Steps
Import Leads to the Public Lead Pool (Home)
In Home, navigate to Customer Center → Public Lead Pool. Click Import Leads in the upper-right corner. In the pop-up window, click Download Template, fill in customer numbers and notes per the template format, then upload the Excel file. The import cap is 10,000 entries per batch. Duplicate numbers are automatically overwritten.
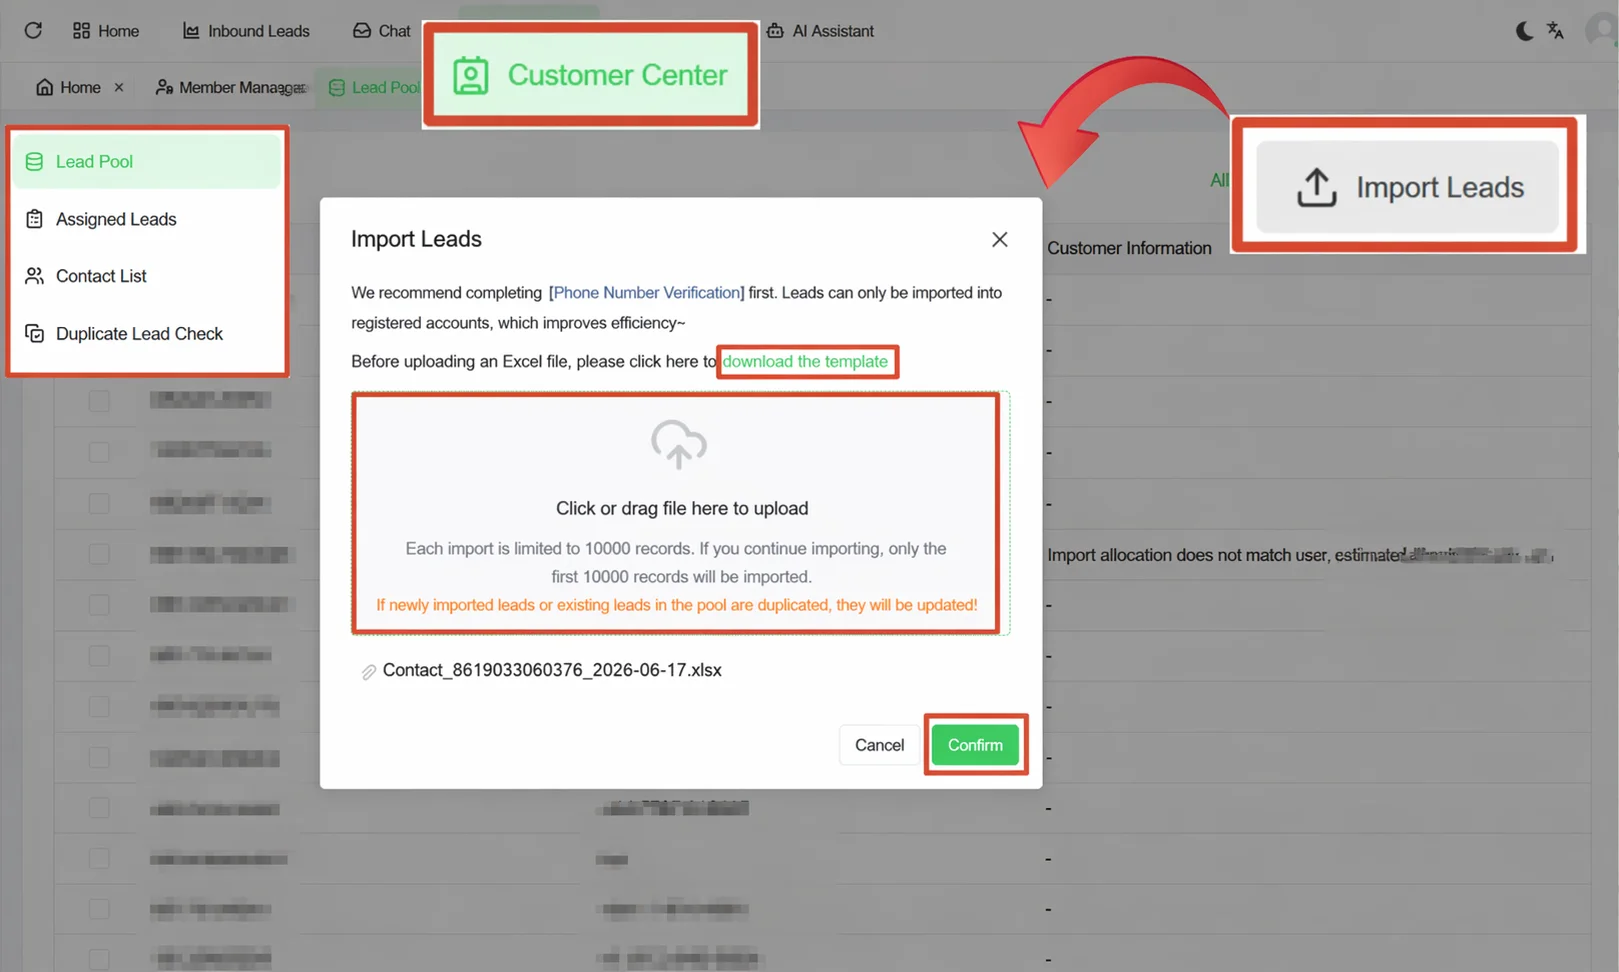
Use the Number Verification feature before importing to filter out numbers not registered with WhatsApp, reducing invalid leads from consuming your quota.
Assign Leads to Sales Reps (Home)
After importing, check the target leads in the Public Lead Pool list. Click Assign All or Assign Selected, choose the team member(s) in the pop-up window, and confirm to distribute the leads.
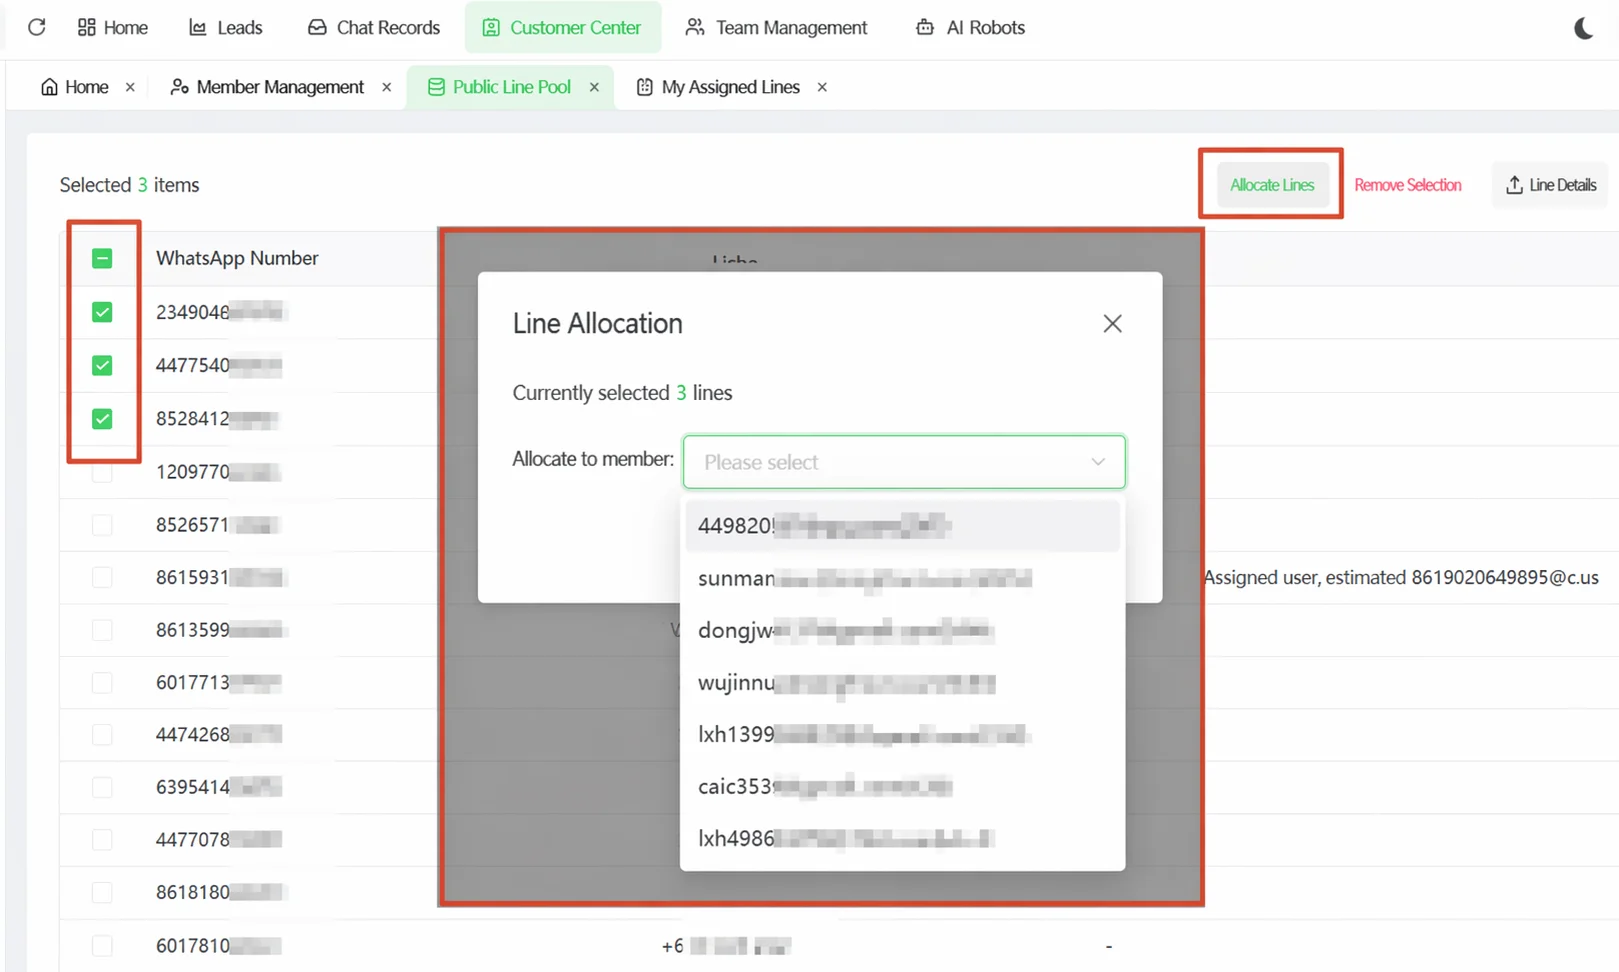 Assigned leads are visible on the Assigned Leads page, which displays the WhatsApp number, remark name, assignment time, and last operator. To reassign, check the desired entries and click Batch Transfer, then select a different member.
Managing Leads (Desktop Client)
Once the admin assigns leads, they automatically appear in the sales rep's Desktop Client lead panel. No manual action is required.
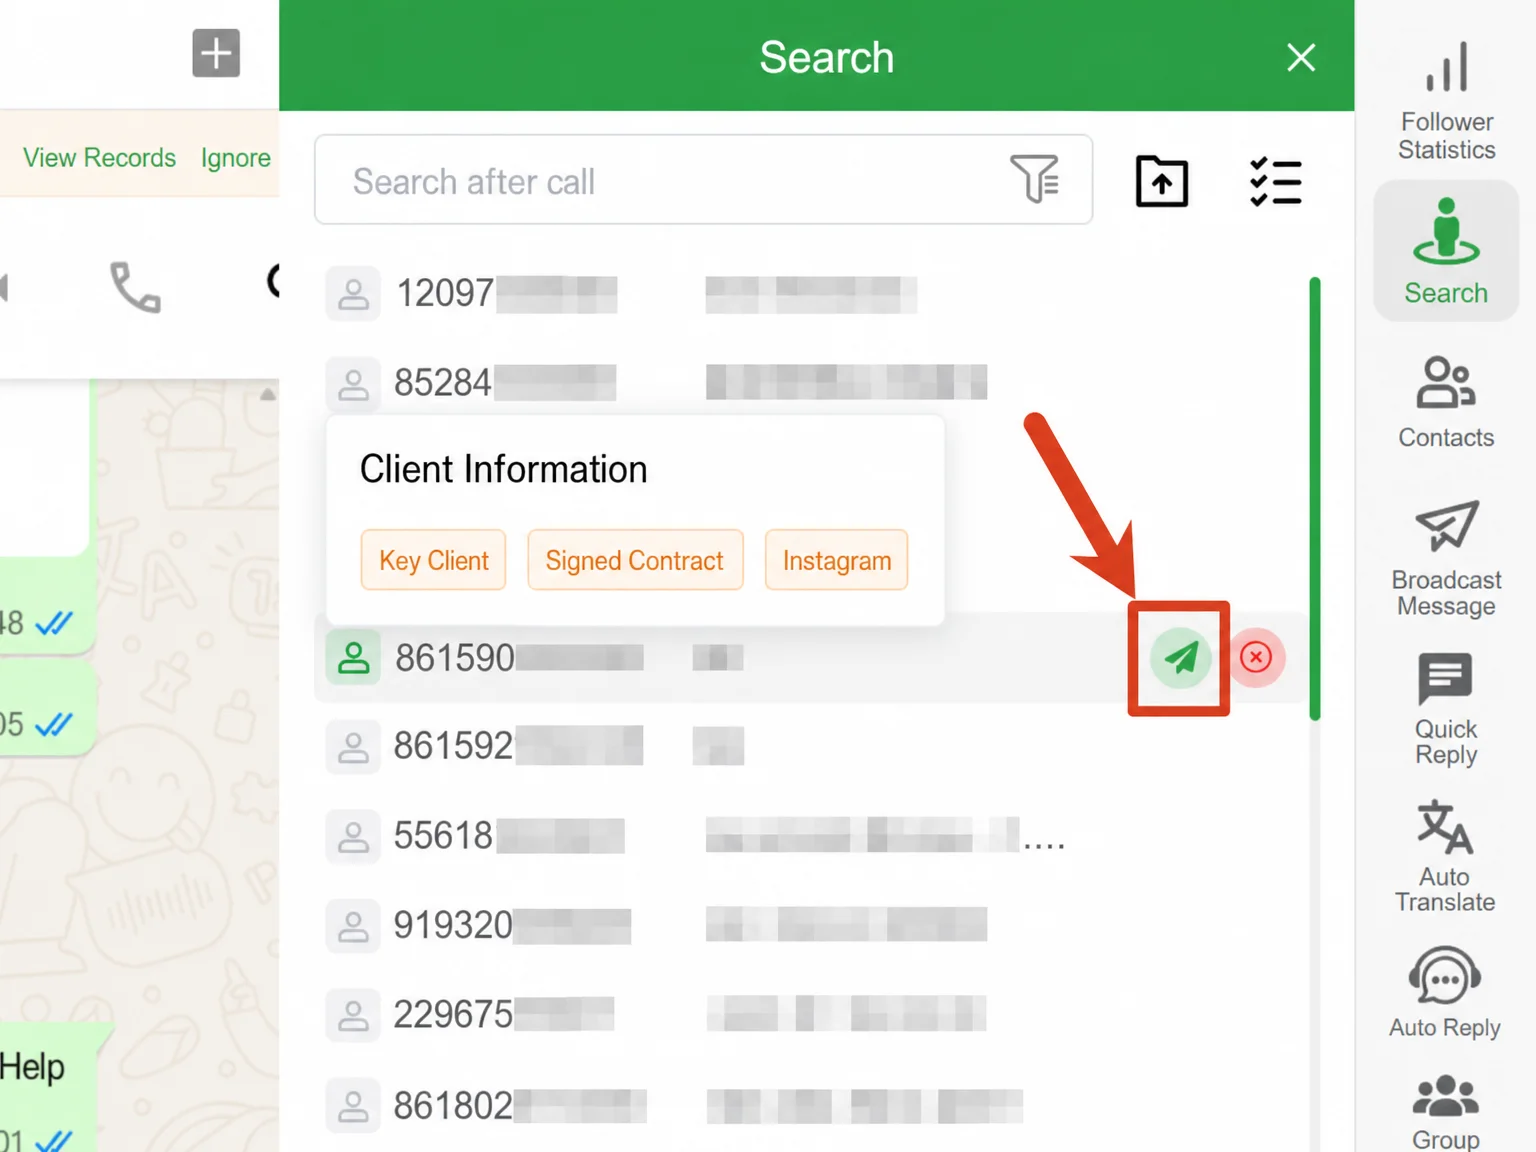 In the Desktop Client, click the Leads icon in the right sidebar. The lead panel opens on the right, displaying numbers and remark names.
Click the green send button next to a number to start a conversation. If the number is invalid or the lead proves unqualified during chat, click the red X to mark it as fail. The admin sees the follow-up status updated in Home in real time.
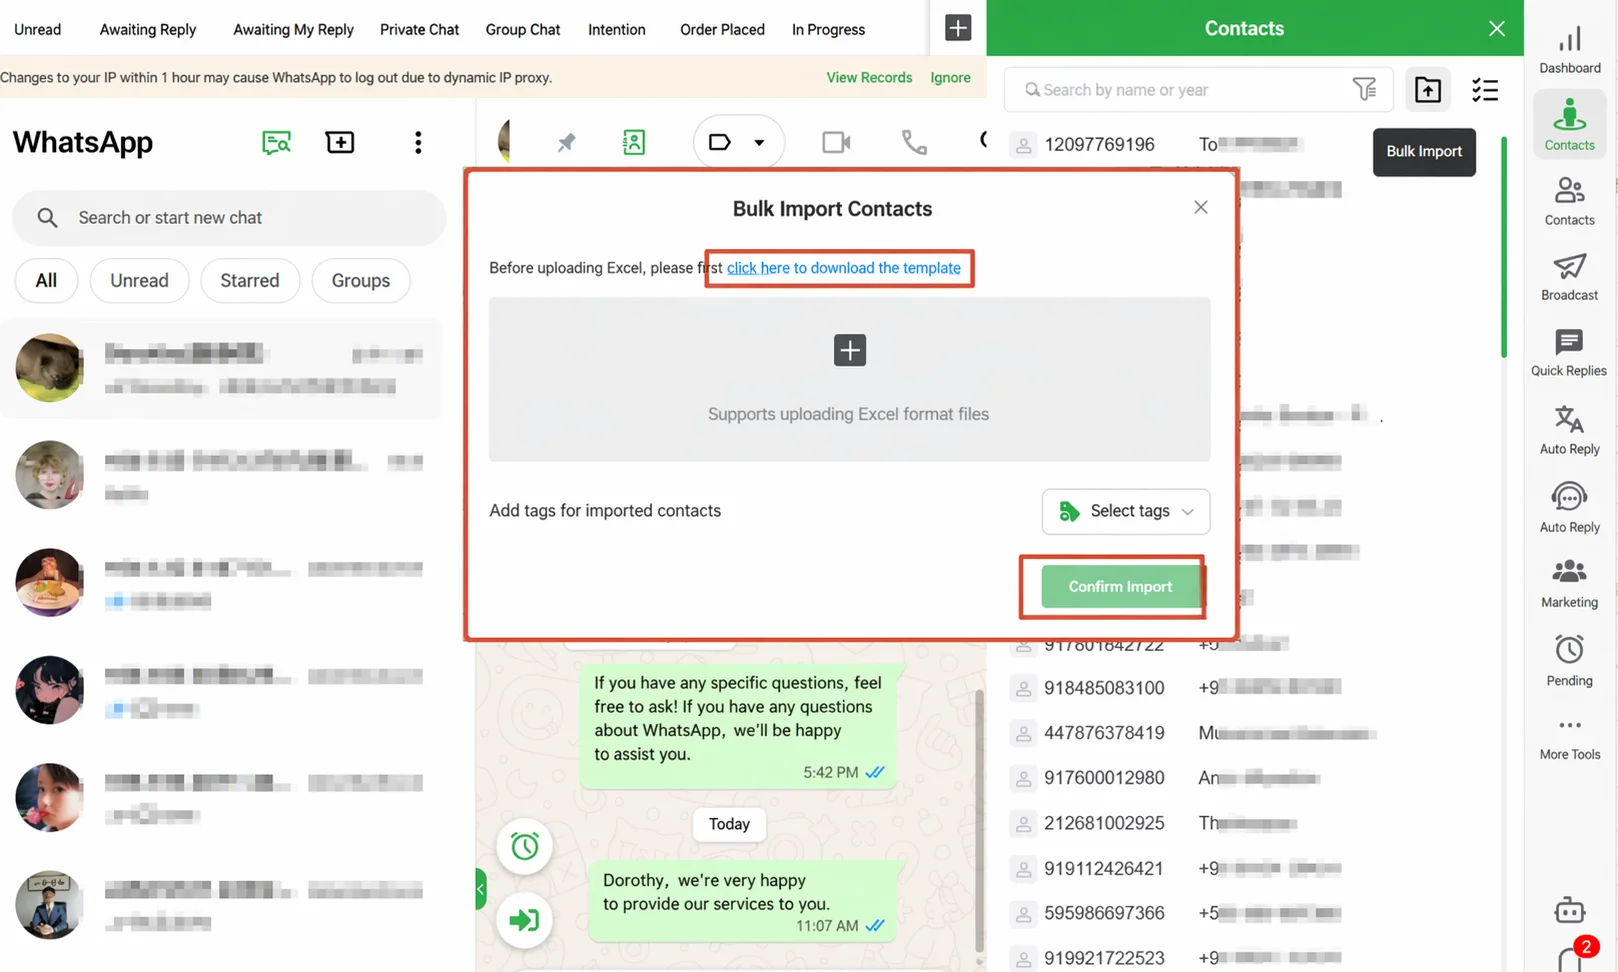
To import your own list, click the Batch Import icon at the top. Upload an Excel file, and click Select Tag before confirming to assign a source tag (e.g., "Expo-2026") to the entire batch for easier filtering later.
Batch Actions on Leads (Desktop Client)
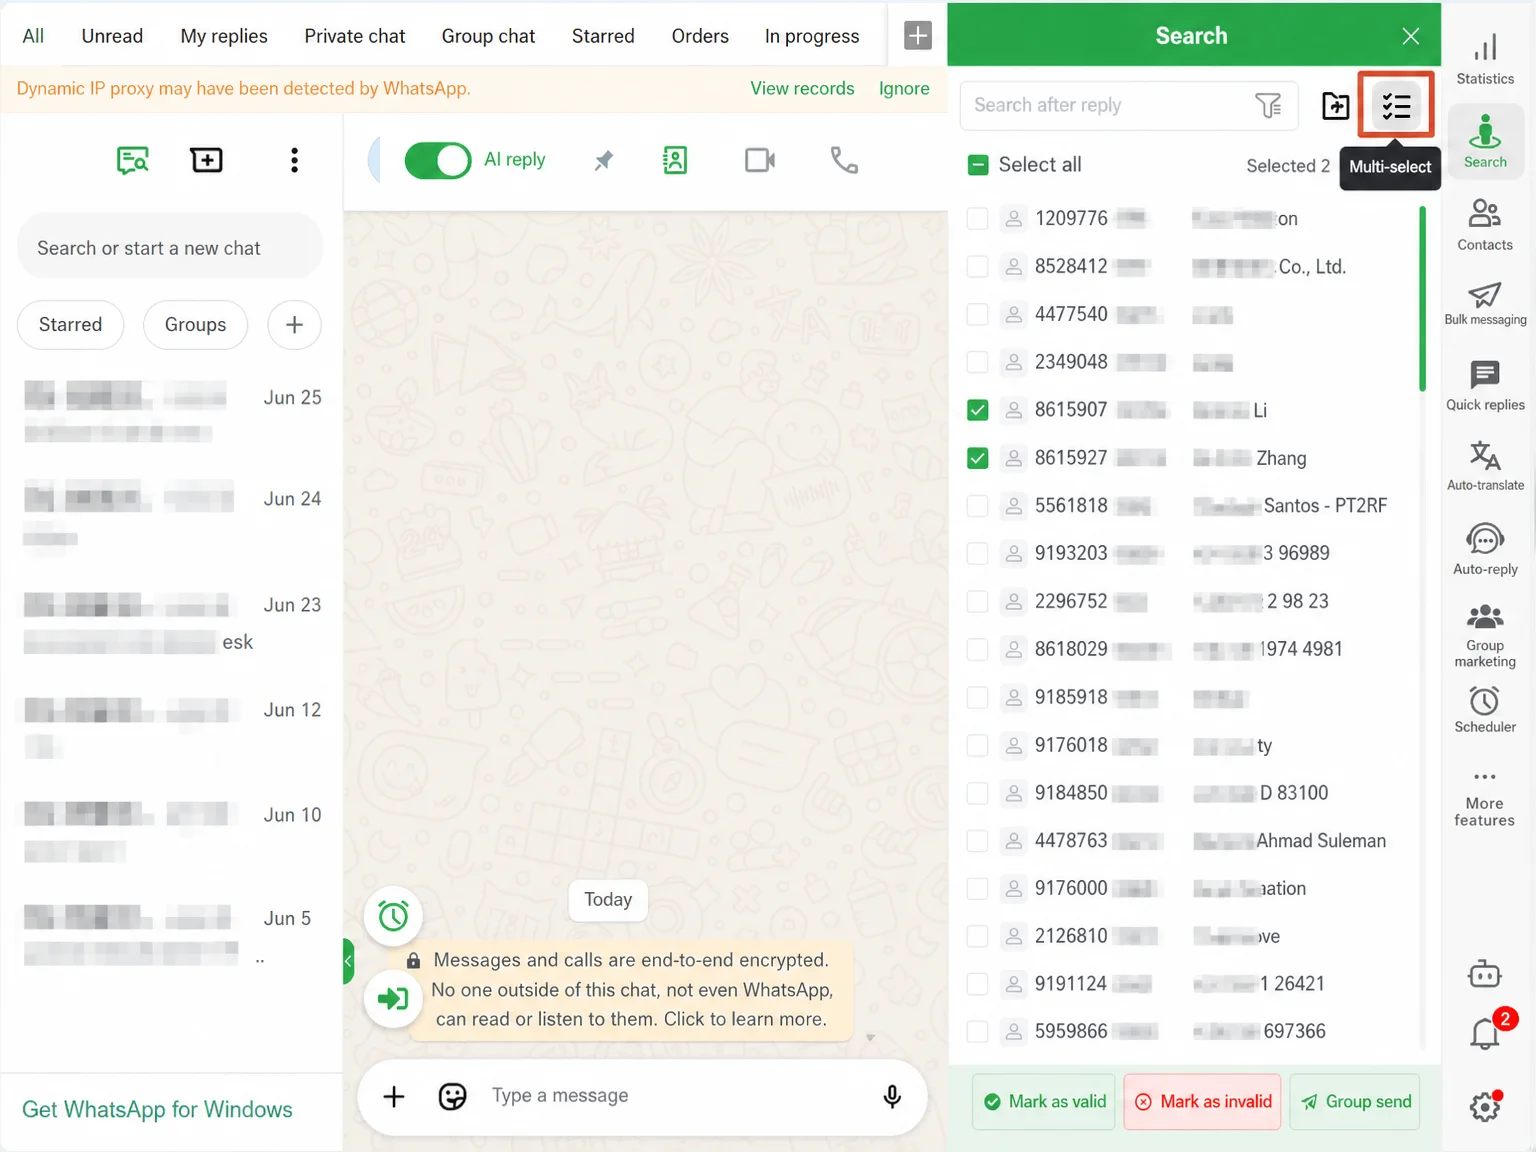
Click the Multi-Select icon at the top of the lead panel to enter multi-select mode. Check the target leads (or click Select All). Three action buttons appear at the bottom:
| Action | Description |
|---|---|
| Mark as Intent / Valid | Marks the selected leads as interested contacts in the follow-up stage |
| Mark Fail | Removes invalid numbers or declined contacts from active follow-up |
| Broadcast | Initiates a message broadcast task for the selected leads |
Filtering Leads
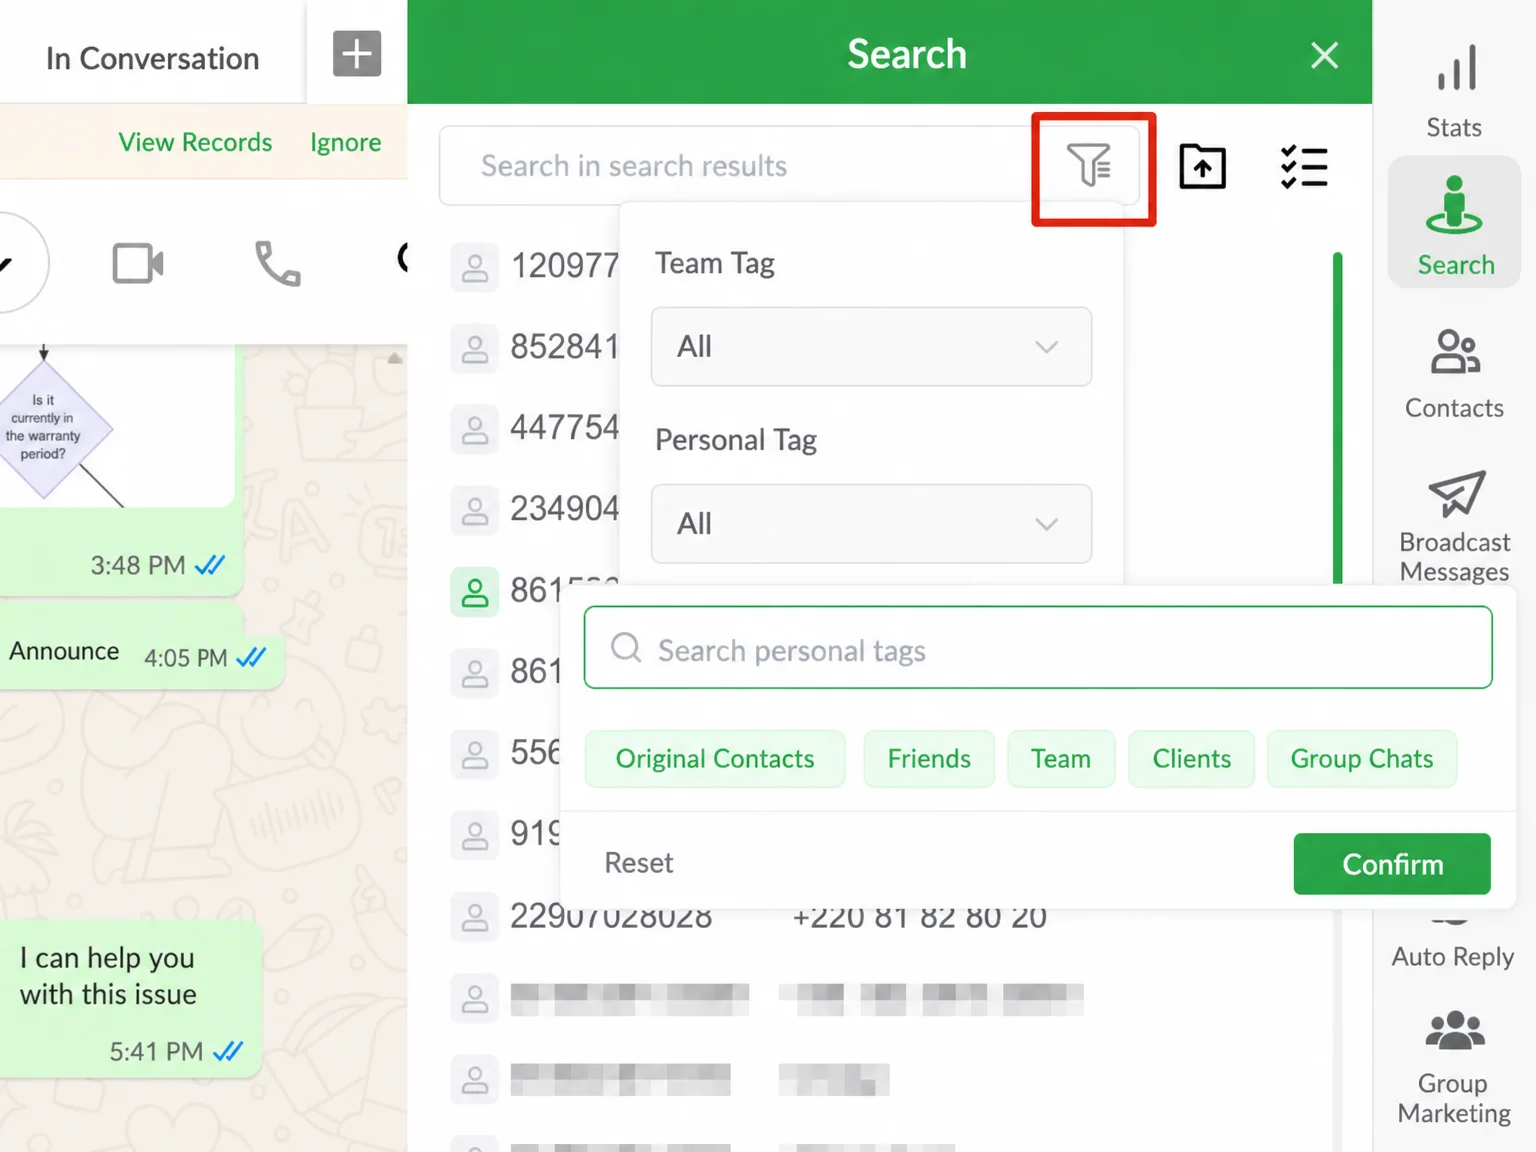
Click the funnel icon at the top of the lead panel to expand the filter panel. Set your criteria and click Confirm. Filter by team tag or personal tag. The list refreshes in real time.
Important Notes
- Assign a source tag during the Select Tag step when importing. Tags cannot be bulk-applied after import — they must be added one by one manually.
- Unassigned leads in the Public Lead Pool are not visible to sales reps. Sales reps only see leads assigned to them.
- The Mark Fail action removes the lead from the list.
FAQ
Q: The admin assigned me leads, but I can't see them in my Desktop Client lead panel. A: Check whether the Assigned Member field on the Assigned Leads page matches your account. If the assignment was just made, try refreshing the Desktop Client and checking again.
Q: Are the leads in the Public Lead Pool and the Desktop Client lead panel the same dataset? A: Not exactly. The Public Lead Pool is a company-level resource visible to all; the Desktop Client lead panel only shows leads assigned to you plus those you imported yourself. The two are only connected once the admin performs an assignment.
Q: Do numbers in the import Excel file need a country code? A: Yes. Numbers must include the country code (e.g., Indian numbers as 919876543210). Numbers without a country code are filtered out. Use the Number Verification feature to validate numbers before importing.
Q: What is the difference between "Assigned Member" and "Last Operator" on the Assigned Leads page? A: Assigned Member is the owner of the lead — the person the admin assigned it to, and it usually stays the same. Last Operator is the person who last took action on this lead, which could be the assigned member or an admin who intervened. When the two differ, someone (usually an admin) has transferred or changed the lead's status.